
A rogue VI has taken over an Alliance training ground located on Earth's moon. Alliance Command needs you to eliminate the VI and reclaim the facility.
Acquisition
This assignment is triggered after reaching level 20 when next traveling to another system. Admiral Hackett will ask for Shepard's assistance in disabling a VI at an Alliance training ground on Luna, which is no longer responding to shutdown commands. The Local Cluster and Sol system will immediately become accessible.
Preparation
You will be fighting mostly synthetic drones on this mission, which are largely immune to physics-based biotics. You will want to choose a squad heavy on tech powers such as Sabotage, Overload, and especially AI Hacking; Tali's engineering background makes her an especially strong squadmate here.
Tip: Strategically this is a great mission to do as soon as you get it, as it will unlock Shepard's specialization class.
Walkthrough
Facility Exterior
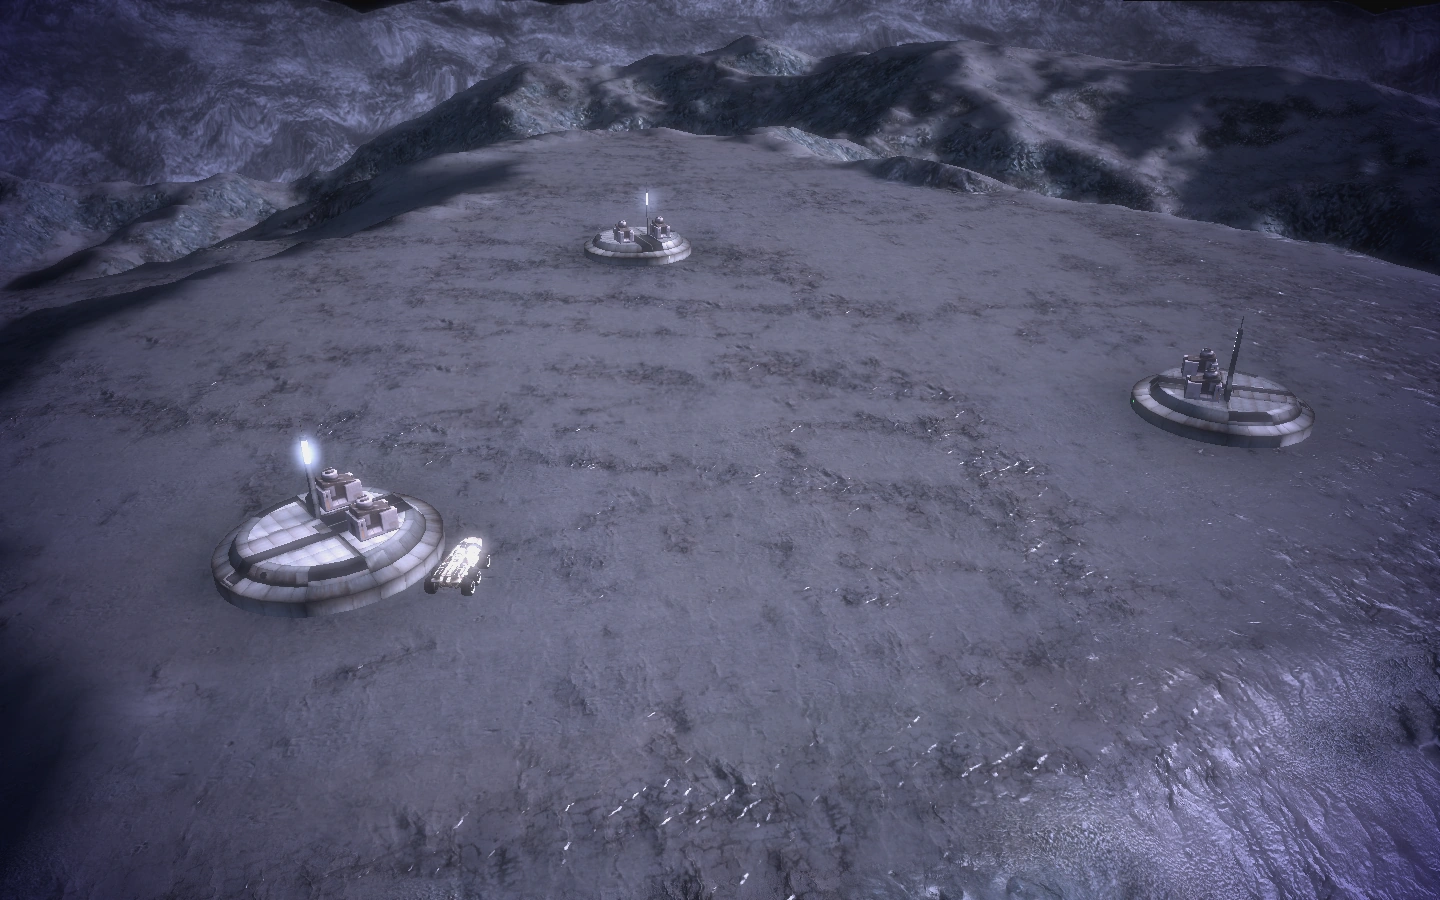
Travel to Luna (Earth's moon) in the Sol system, Local Cluster. Consult your map to determine your location and route to the facility, and travel there. Be aware that there are two turrets on the rooftop of each of the facility's three bunkers. Although taking them out is NOT necessary to complete the assignment (you can enter the bunkers with the turrets active and they will automatically shut down once you clear out all three bunkers), the additional experience from knocking them out is worthwhile. Attacking from a distance is advisable, as this increases the chances of being able to dodge the rockets. Alternatively, you can circle strafe around each set of turrets while firing at them.
Once you have gotten past the turrets, pick a bunker and start clearing them. It doesn't matter what bunker you choose, as the defenses are dependent on the order in which you enter them, not on their geographical location or difficulty level. The only thing that changes is the location of loot: each bunker has a secure crate and a secure storage locker (both requiring average Decryption) in the first room, but their exact positions vary from bunker to bunker.
Each time you take out a system of VI Conduits, a new defense mechanism is activated.
Insanity Tips:
- The Advanced Rocket Drones you will encounter in the second and especially third bunkers can one-shot you easily, so you will need some clever tactics to prevail without dying.
- Manually order your squad to take position in the first chamber - somewhere with at least some view down the hallway but maybe not straight ahead of the doorway. Then go down and shoot and/or hack a drone yourself and hightail it back - some drones will follow to the near the hallway and you and your squad can take them down. When things get too hot, hit the "close" button on the hatch and the drones won't follow. You can revive/heal/recharge your squad before opening the door again.
- If you want to be extra sneaky (at possible cost to your sense of having vanquished the foe in a fair fight) you can run out of the bunker at any time without penalty, and all the still-functioning drones will return to their home positions and you will get a free revival of any downed squad members.
- Tali is particularly useful on this mission for her Hacking ability -- as you enter each bunker you can hack one of the drones, and then stand out of the way while the drones damage each other.
- Always keep a solid object between you and any rocket drones.
VI Bunker One
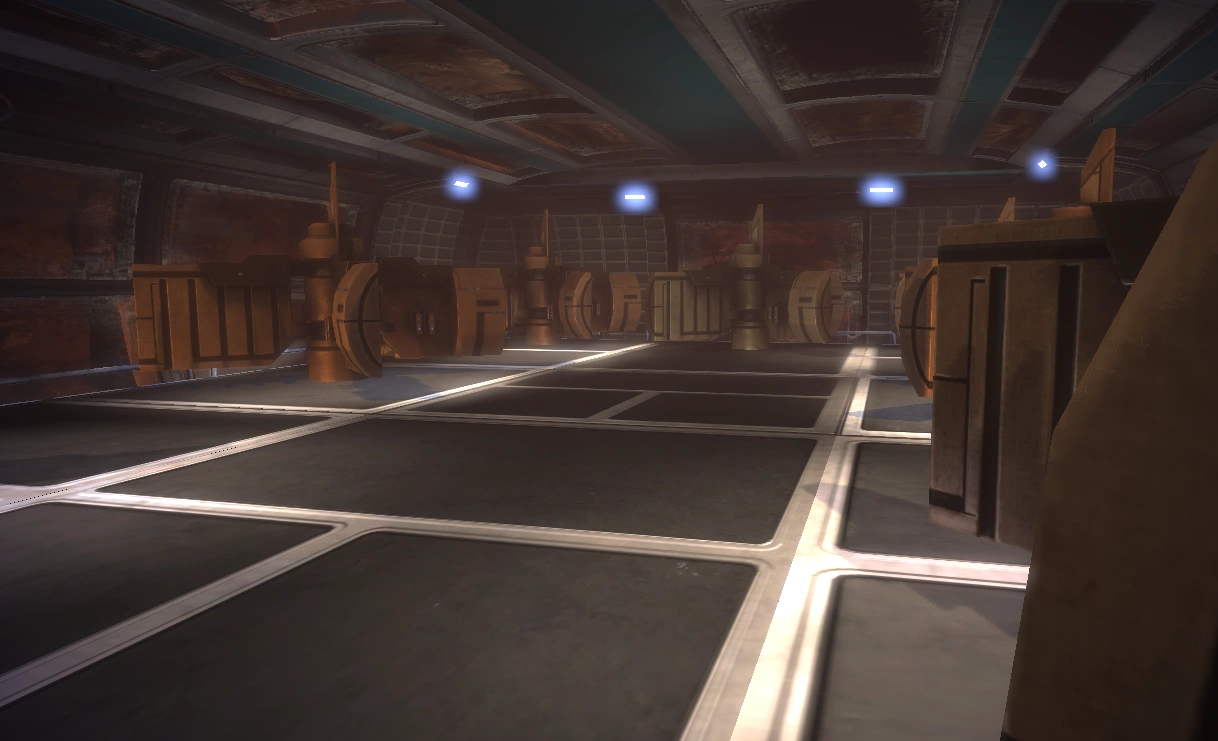
When you enter the main room the drones will not attack until they see you. This bunker will contain nine Advanced Assault Drones. If you get overwhelmed, which is easy in this mission, and can happen very quickly, backpedal into the entry room; sometimes the drones follow and sometimes they don't. You can also destroy the four Power Junctions in each corner to damage the nearby drones. Once they're all down, move to the back rooms and shoot the VI Conduits in the back rooms. There are four in each room, so make sure to take out all eight in each bunker. Scan a data port in the first room you enter for a Codex entry.
Defense Activated: Toxic gas is released.
- The gas doesn't seem to do anything besides reducing the healing granted from First Aid. The VI Conduits' explosions do inflict minor toxic damage on anything in close proximity, including the drones.
VI Bunker Two
More powerful Advanced Rocket Drones will be introduced in this bunker. There will be seven Advanced Assault Drones and two Advanced Rocket Drones in the main room. Again, if you get overwhelmed, or start to get overwhelmed, then backpedal into the entry room. As with the first bunker, sometimes they will follow and sometimes not. Once they all fall head to the back rooms for the next eight conduits.
Defense Activated: Kinetic barriers are erected over each doorway and over each of the VI Conduits.
- Typically the kinetic barriers do not survive much damage before dissipating. One or two shotgun blasts will take them out. It is also possible to shoot over or past the kinetic barriers on the VI Conduits to speed up their destruction, though you risk toxic damage if you stand too close. A way around this is to get on an angle that allows you to shoot past the barriers from the other side of the room, opposite and angled from each conduit you are trying to destroy.
VI Bunker Three
When you enter this bunker, you are in for a much harder fight. This is complicated by the fact that sometimes you cannot save once you enter the bunker; it is unknown if this is a bug. If you have the option of saving, it is recommended that you do so, considering the difficulty. If you cannot, exit the building, save, and then reenter.
When you have saved, open the door to the main room and fight four Advanced Assault Drones and five Advanced Rocket Drones. These drones will frequently follow you into the entry room if you get overwhelmed. If you do, remember that the entry room for each bunker contains Power Junctions, which can explode and damage the drones after enough damage. The main room will contain them as well. Try to engage only a few drones at a time. Once all the drones have fallen, head to the back rooms and take out the final eight VI Conduits.
Alternatively, you can use Barrier or Immunity on yourself and your squad, make a dash for the back rooms and take out the first four VI Conduits in the room to the left. You will only need to destroy three Advanced Assault Drones in the room to the right with this strategy, before destroying the final four VI Conduits. Once all of the VI Conduits have been destroyed, all remaining drones will be destroyed.
Defense Activated: More combat drones are activated.
- These spawn in the room opposite from the room you are in when you destroy the first VI Conduit. There will usually be one rocket drone and two assault drones. The rocket drones can be dangerous in close quarters and should be handled first. Although these will not usually leave the room, sometimes they will follow you into the main room.
Note: Cleaning all of the drones out of all three bunkers before shooting any of the VI nodes produces a different fight sequence: in this case all three bunkers will contain mainly Advanced Assault Drones with only the occasional Advanced Rocket Drone. However, when you then go around the now-supposedly-empty bunkers shooting out VI nodes, you will find that the third bunker has been restocked with the more dangerous Rocket Drone mix of enemies. You will thus face four groups of drones this way rather than three, producing more risk but more experience points.
Specialization Class
Once the mission is complete, you will be presented with a text dialog depicting the VI's final moments after which you will be rewarded with a specialization class. See below for the translation of the message.
Mass Effect 2 Consequences
- Miranda refers to the VI as the Hannibal system if you respond to EDI's introduction with hostility.
- When discussing AIs with EDI on the Normandy SR-2, it is more or less confirmed that the incident on Luna was in fact the result of an experiment in creating 'controllable' AI. Clearly things did not go as planned.
Mass Effect 3 Consequences
- In Priority: Cerberus Headquarters, a Cerberus report reveals that the VI was later modified with tech salvaged from Sovereign. The resulting AI was EDI, who admits to it if asked. If you did this mission, Shepard briefly alludes to bad starts. If not, Shepard claims to have heard about the incident second-hand.
Enemies
Trivia
- After the VI is destroyed, the terminals display the following message in binary, repeated over and over:
- 01001000
- 01000101
- 01001100
- 01010000
- Converting the binary to ASCII reveals that the message reads 'HELP'.
- The journal entry, after this assignment, hints that the VI may have been deliberately sabotaged to make it achieve sentience.
- In Mass Effect 2, Miranda Lawson reveals that the VI was named Hannibal. This is likely in reference to the Carthaginian general Hannibal Barca, who is best known for leading his troops, including elephants, over the Alps during the Second Punic War.