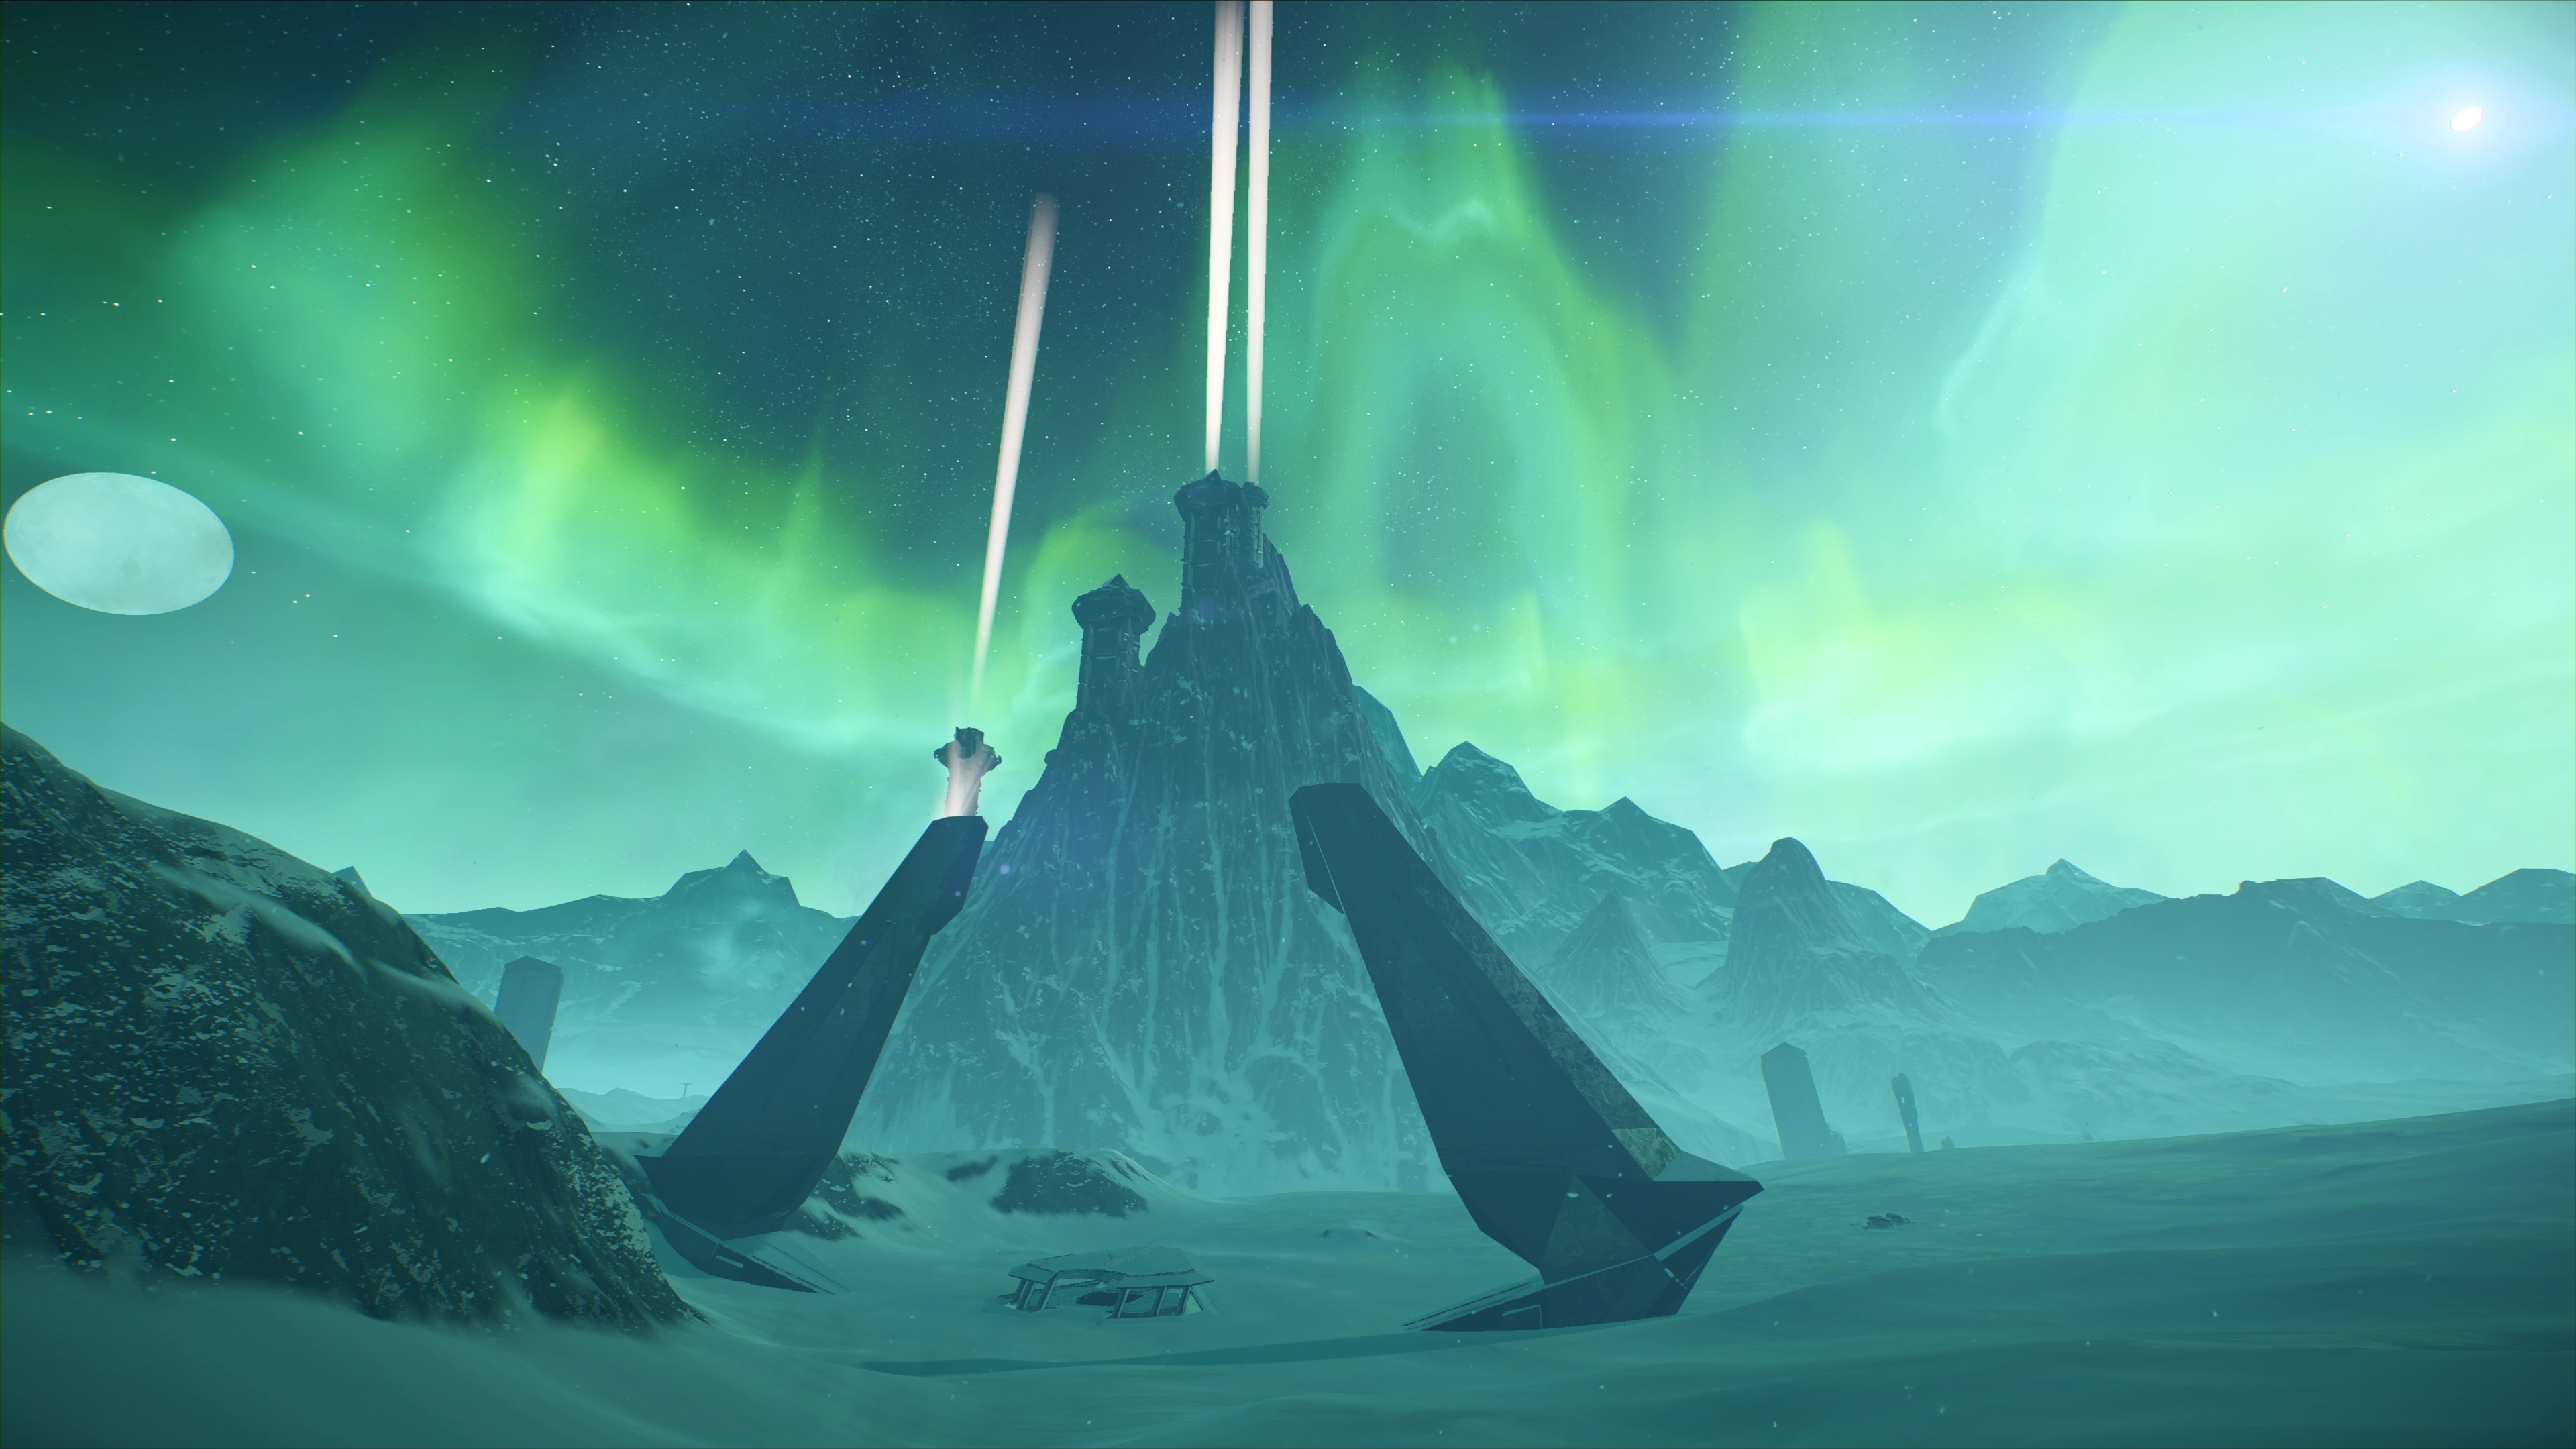
Remnant technology is key to restoring Voeld and transforming it into the golden world it used to be. However, a remnant vault must first be located by activating the monolithic Remnant structures nearby.
Acquisition
Pathfinder Ryder will receive this mission automatically after getting close to one of the three monoliths.
Walkthrough
Activate Monoliths
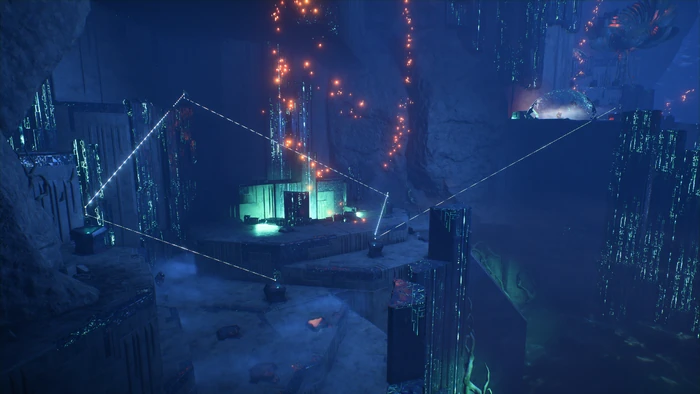
When Ryder approaches a monolith location, a sub-mission and two objectives are added each time that need to be completed: The Monolith, Scan For Glyphs, then Activate the Monolith. Every monolith has 3 missing glyphs each that require searching by following the power lines snaking out of the console, visible through scanning. For the monolith puzzle solutions (needed for the Cryptographer Achievement), see below.
The Northern Monolith
This monolith![]() is south-southeast of Techiix, or the Forward Station nearest the center of the map. Approach from the east. Find the three missing glyphs (Adherence, Entropy, and Magnitude Glyphs). Solve the puzzle on the console once all glyphs have been found. On the platform is an Adaptive Remnant Core Device that can be scanned for +100
is south-southeast of Techiix, or the Forward Station nearest the center of the map. Approach from the east. Find the three missing glyphs (Adherence, Entropy, and Magnitude Glyphs). Solve the puzzle on the console once all glyphs have been found. On the platform is an Adaptive Remnant Core Device that can be scanned for +100 ![]() .
.
The Southwestern Monolith
This monolith![]() is south of Taerve Uni. If you do not know this yet this is the soon-to-be outpost marker for the Settling Voeld mission. Approach from the north and the monolith is in the deep valley. Find the three missing puzzle glyphs (Magnitude, Nihility, and Verdurous Glyphs) by climbing the pillars near the console, then hopping onto a nearby structure for two of them and locating one on the ground level. Solve the puzzle on the console once all glyphs have been found.
is south of Taerve Uni. If you do not know this yet this is the soon-to-be outpost marker for the Settling Voeld mission. Approach from the north and the monolith is in the deep valley. Find the three missing puzzle glyphs (Magnitude, Nihility, and Verdurous Glyphs) by climbing the pillars near the console, then hopping onto a nearby structure for two of them and locating one on the ground level. Solve the puzzle on the console once all glyphs have been found.
The Southeastern Monolith
This monolith![]() lies north of the southernmost Forward Station. Find the three missing glyphs (Semiosis, Synaptic, and Zero Glyphs) by going outside of the cave and two are on the sides of the same block, while the last is near the console inside the cave. Solve the puzzle on the console once all glyphs have been found.
lies north of the southernmost Forward Station. Find the three missing glyphs (Semiosis, Synaptic, and Zero Glyphs) by going outside of the cave and two are on the sides of the same block, while the last is near the console inside the cave. Solve the puzzle on the console once all glyphs have been found.
Investigate Vault Entrance
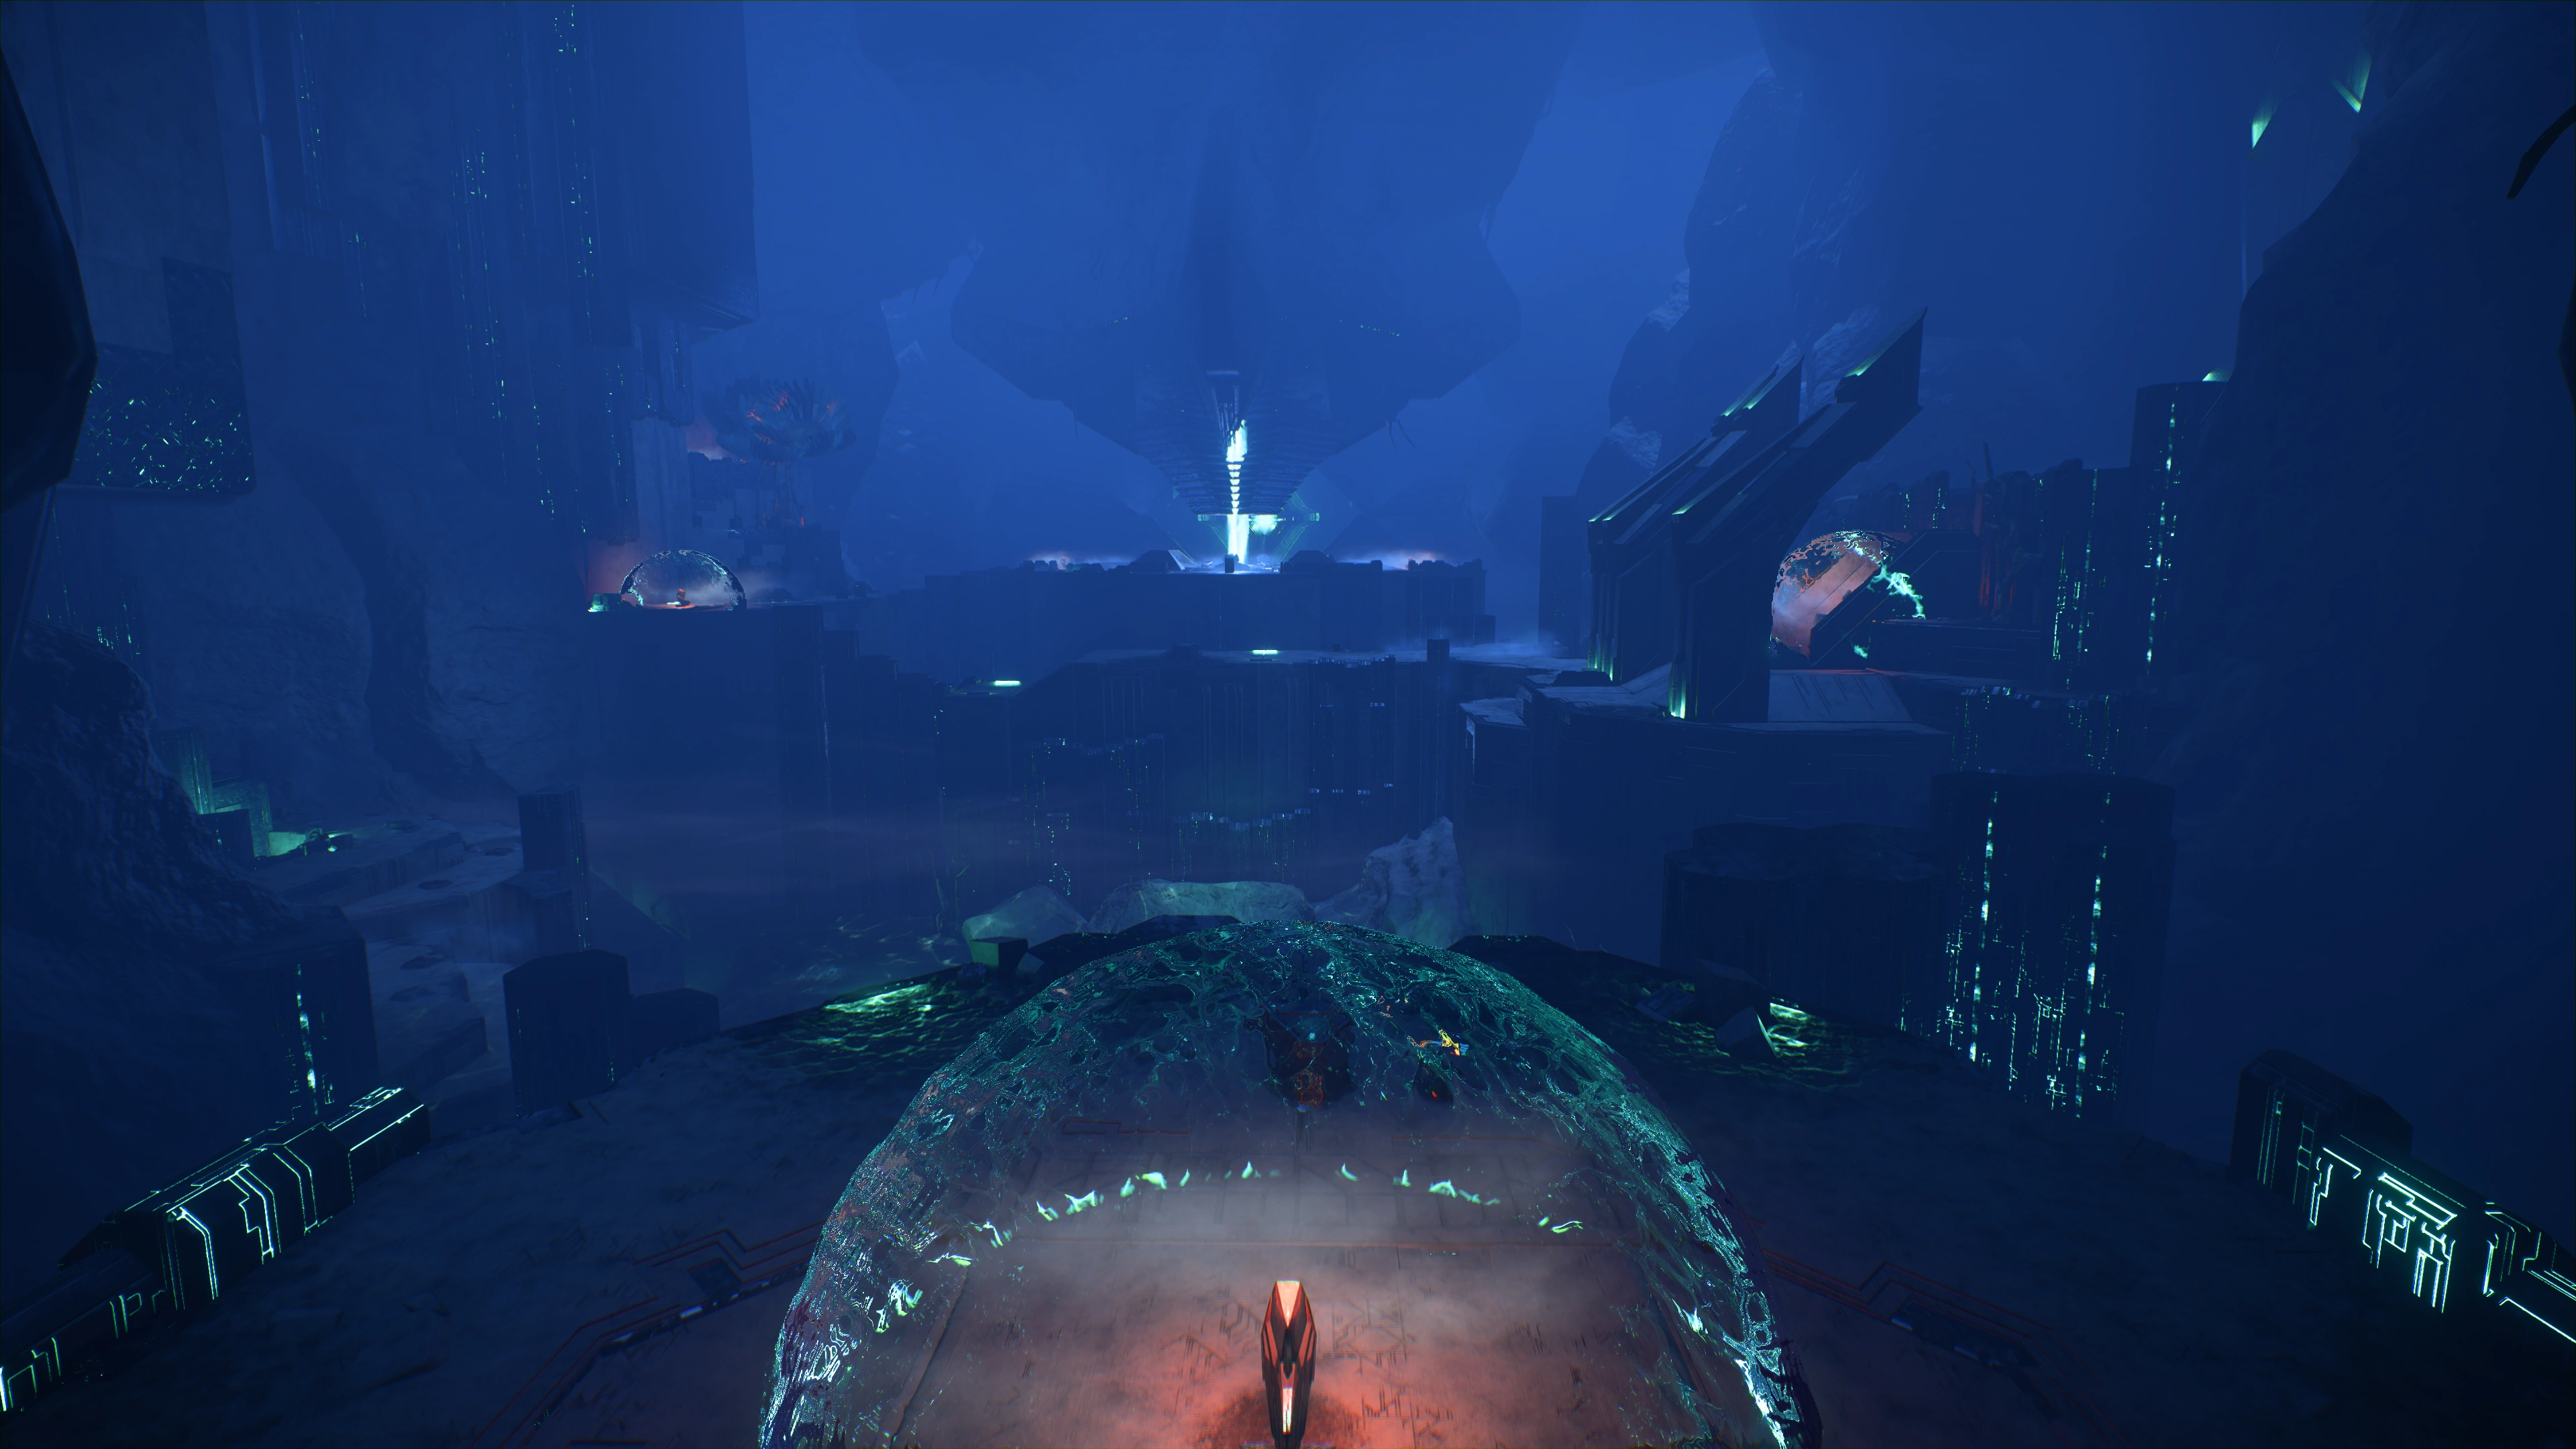
The vault is located between the three monoliths where their lightbeams converge, as with Eos. Head to the navpoint![]() . The entrance rises from the ground when Ryder approaches. Take the gravity well down.
. The entrance rises from the ground when Ryder approaches. Take the gravity well down.
Activate Emergency Power
Use the nearby power console as soon as you can. Be aware that the cold hazard is Level 2 in the vault. The Remnant Shield Chargers in this vault keep Ryder's life support from getting depleted by the environment. Using Backup Life Support consumables will be helpful.
Manual saves are enabled inside the vault.
Lift The Vault Lockdown
Scan +100 ![]() from the Adaptive Remnant Data Core behind the gravity well platform, then use the console on the upper ledge to open the door to the main room.
from the Adaptive Remnant Data Core behind the gravity well platform, then use the console on the upper ledge to open the door to the main room.
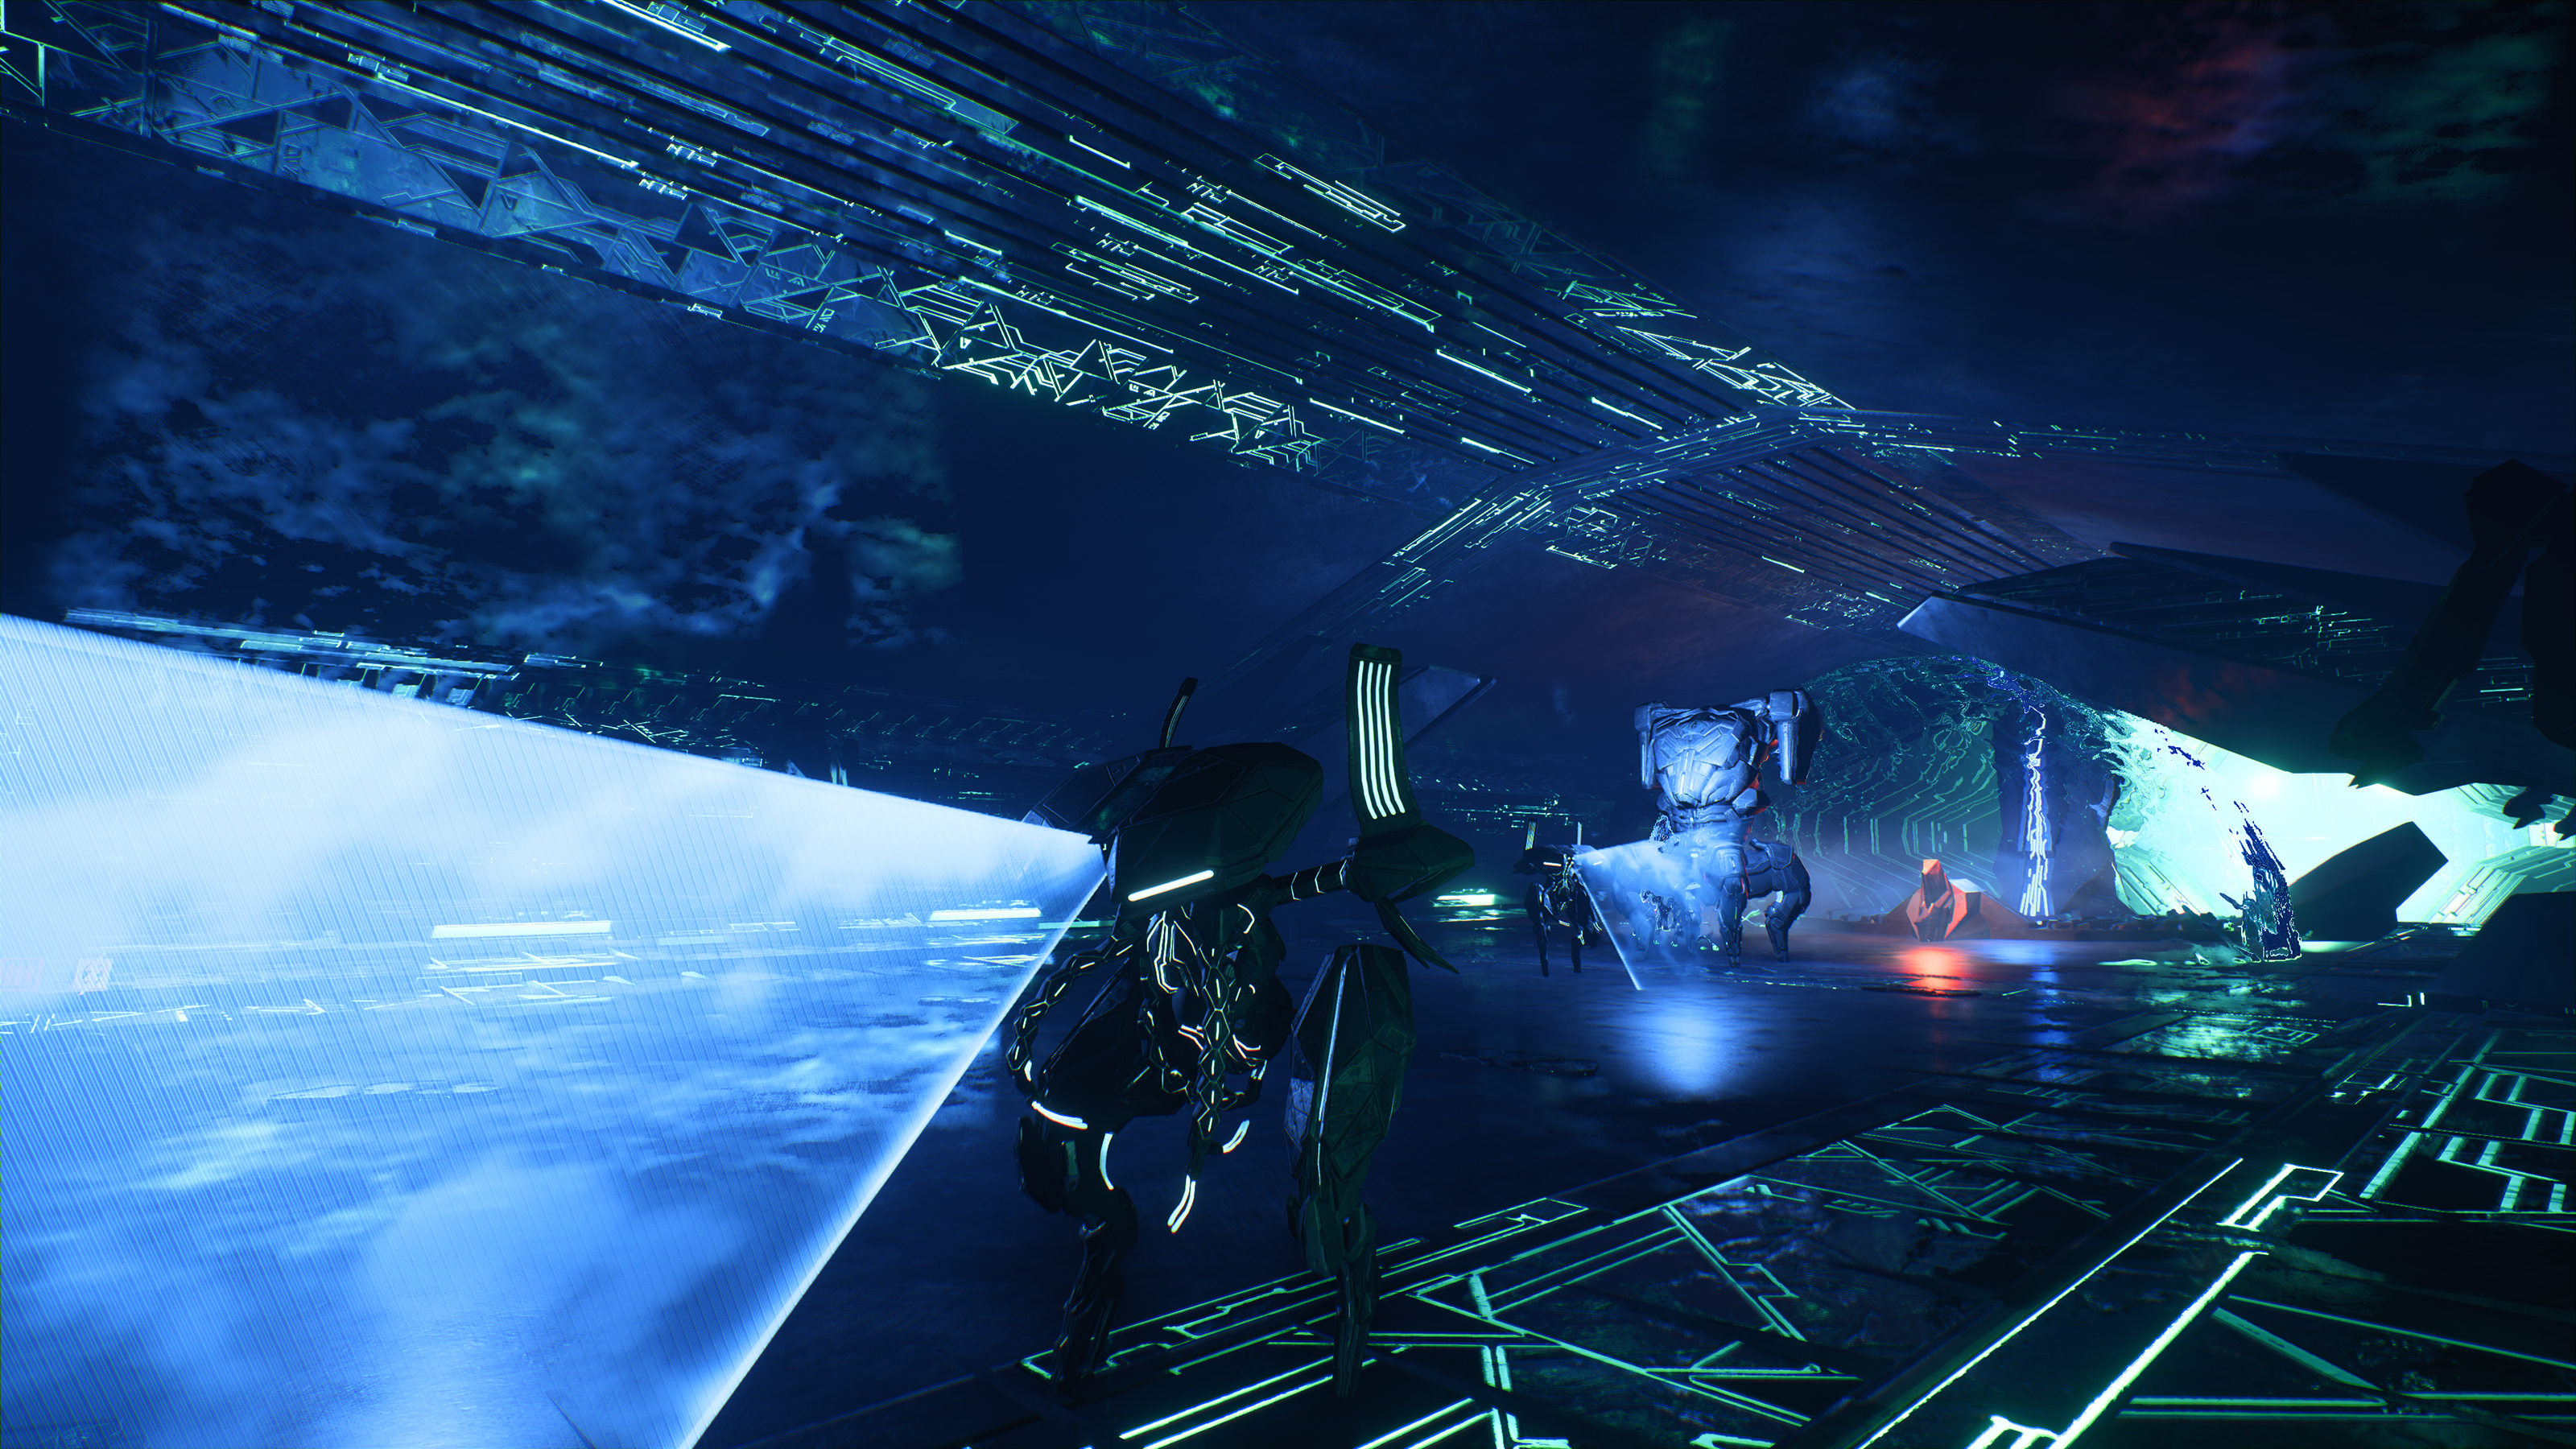
Enter the main room. In the entrance area is a console: It's a toggle switch between the left and right-hand paths of the chamber. The right path directly leads to the vault center while the left path has more console switches for loot and valuable materials.
The consoles at the left path successively link to each other in a chain until a platform containing items or a console on the other side of the chamber is revealed, depending on configuration. All of them are linked to the console also powering the shield charger that keeps you from freezing to death in between tries. If your life support is getting low, just toggle the console to enable the shield charger again before going for another round. Your previous configuration is kept as is to save you the hassle of restarting.


There are two containers and one Adaptive Remnant Data Core (+100 ![]() ) on the left side of the chamber. Toggling the console linked to the first container platform raises an adjacent platform spawning an Observer. The first container's platform is composed of three pillars while the Observer platform only has one.
) on the left side of the chamber. Toggling the console linked to the first container platform raises an adjacent platform spawning an Observer. The first container's platform is composed of three pillars while the Observer platform only has one.
Two other configurations lead to developments on the right side: access for the final loot container (accessible only after vault activation) and a Remnant Data Core for Task: Remnant Data Cores. Tampering with the console connecting to the console that enables access to the data core will cause an Assembler to spawn from a nearby platform.
The right path's shield charger has a few Assemblers and an Observer nearby. After you dispose of them, you can check out the floor above. There are two consoles there. One opens a door leading to a chamber containing a few Assemblers and a Destroyer. After taking them out, there's another puzzle console that grants 2 skill points on successful solving.
The room has only one entrance and exit so upon going back the way you came you can check out the only other console in the vicinity. By default it has raised platforms leading to the vault center as a shortcut. Toggling it will cause SAM to warn that you will have to take the long way out since they're lowered, but then another set of platforms rises up and makes the final loot container chamber available.
If you choose the long way out, that means you also choose the long way in. The way to the next shield charger is blocked by a Nullifier. After destroying it and replenishing your life support, if you configured the left-side consoles earlier correctly there should be another console just outside the shield bubble. Activating it lowers the shield around the final container chamber for your sprint-out looting later.
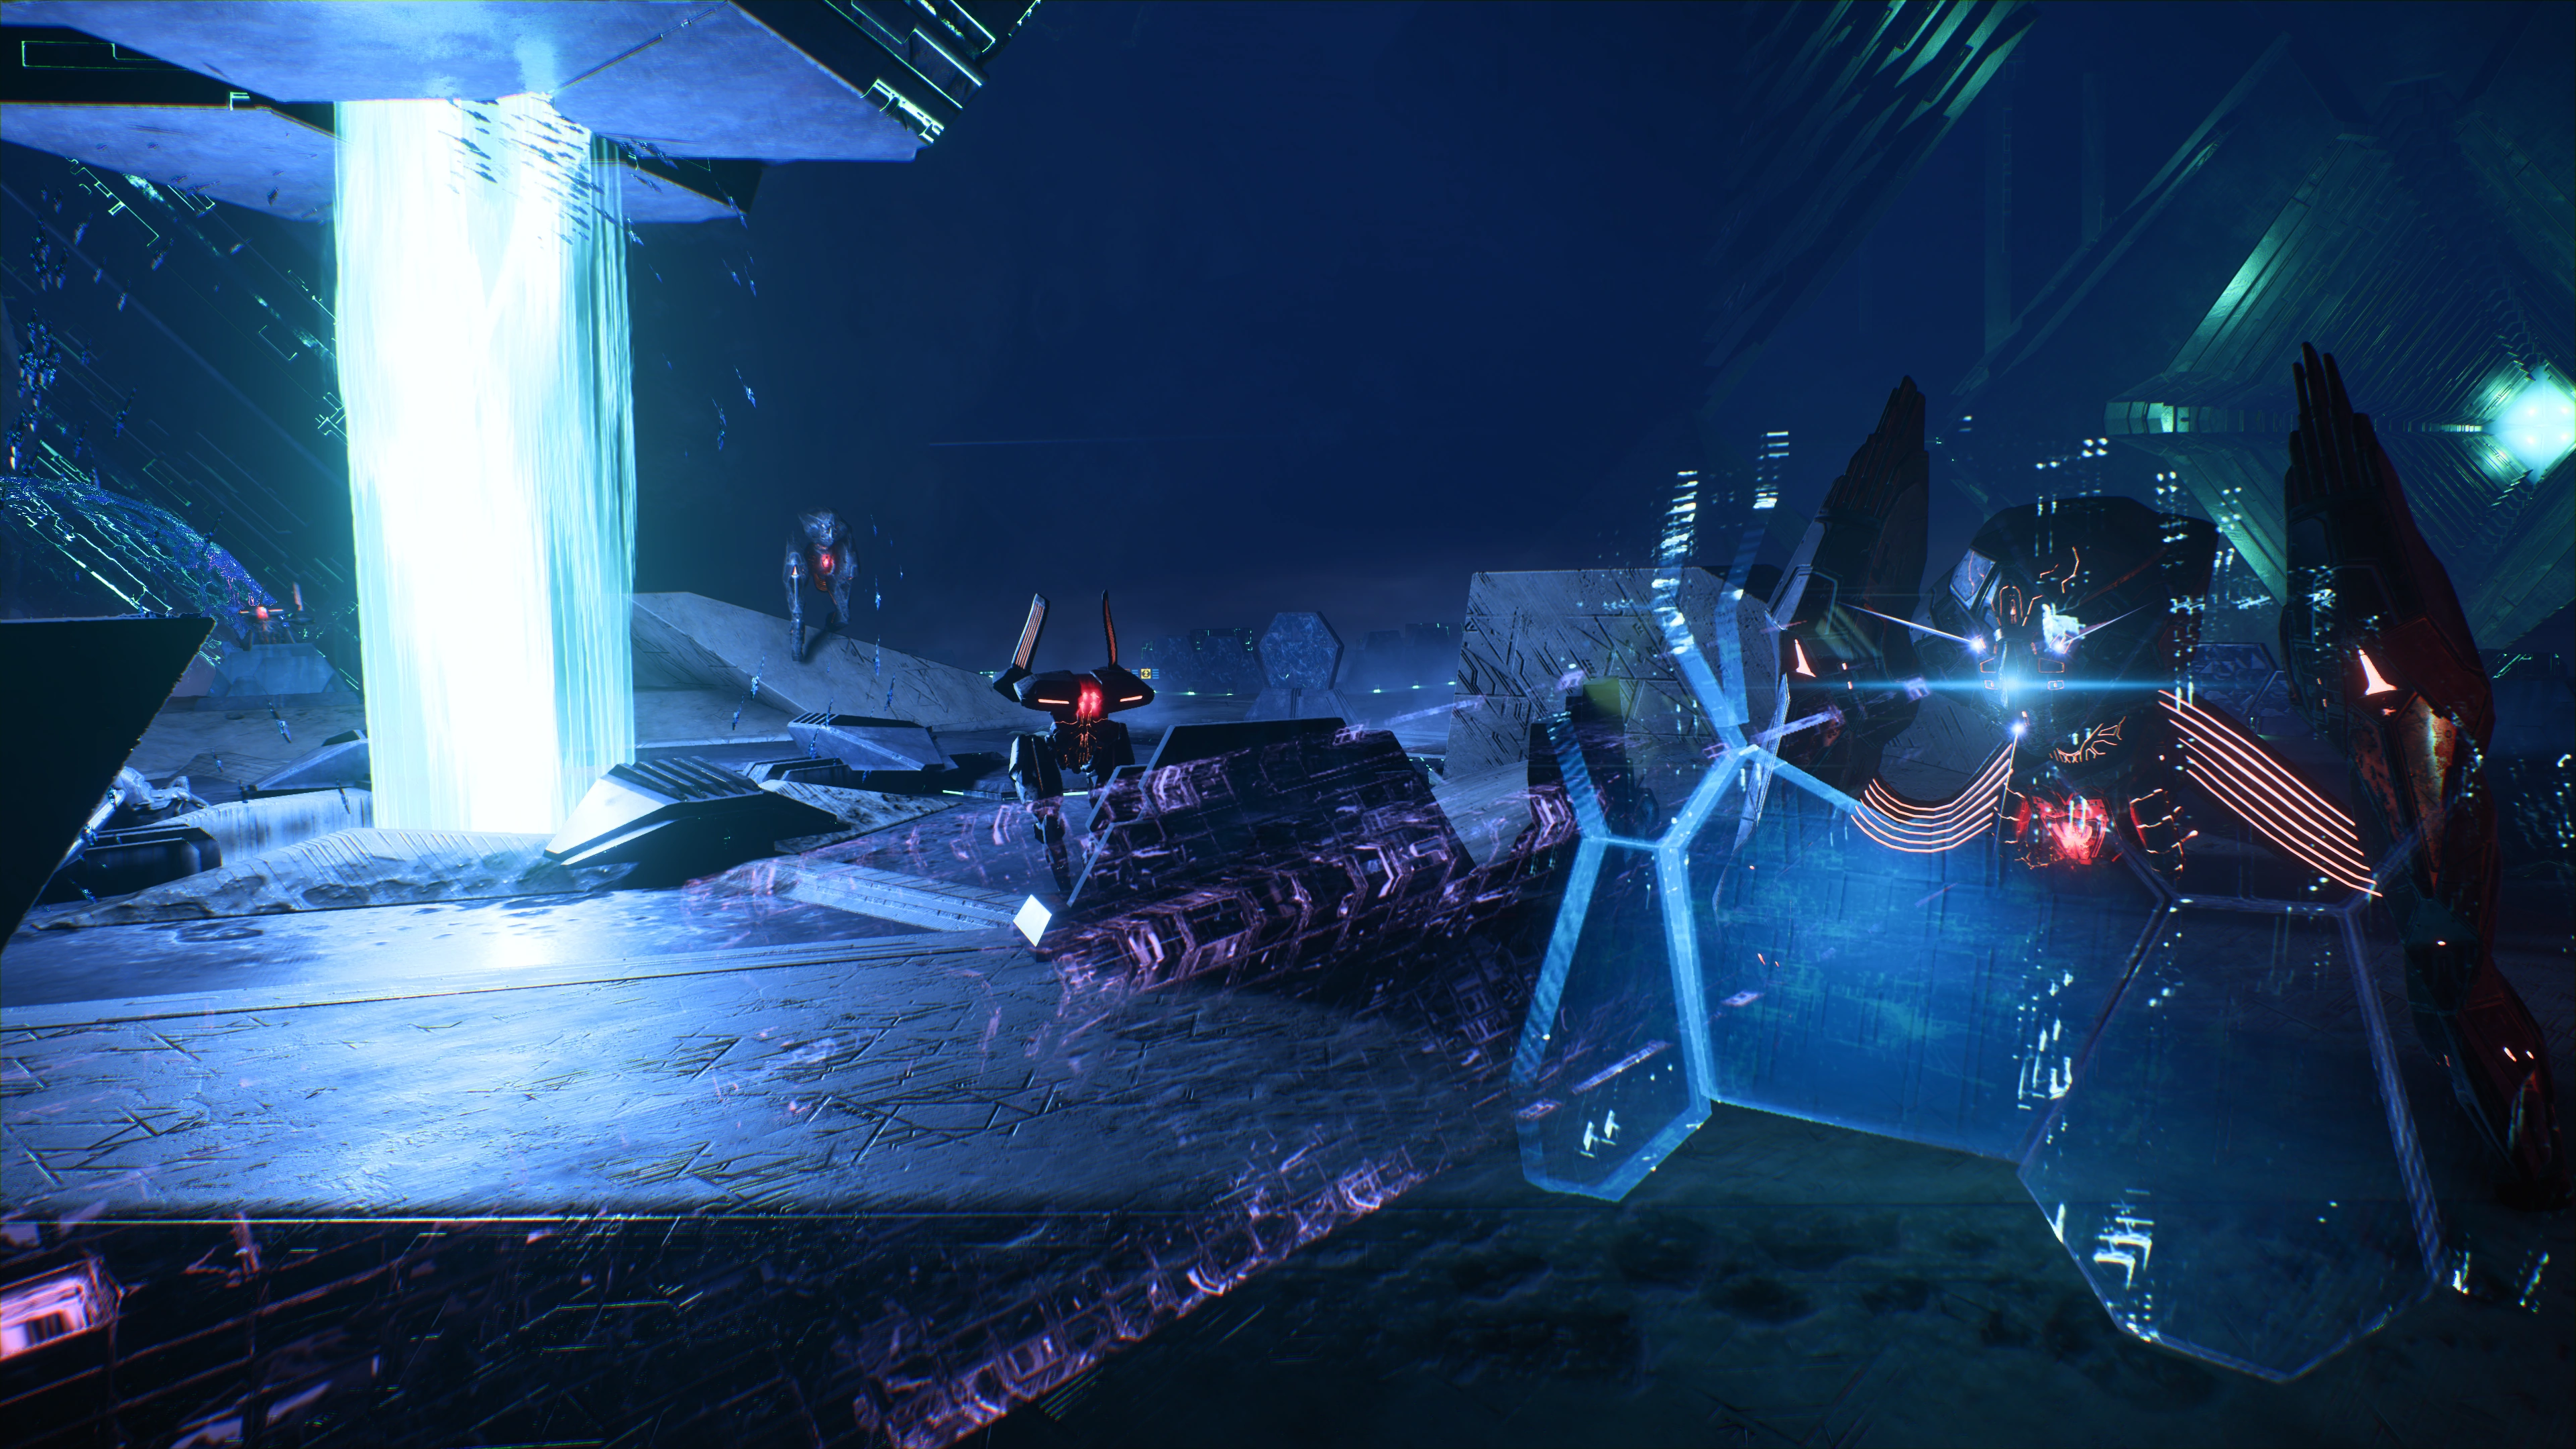
Upon approach to the vault center, a couple of Nullifiers and Assemblers spawn to defend the area. After dealing with them and adding their remains to your inventory, SAM helpfully reminds you that you can backtrack before finally activating the vault.
If you skipped some things getting there this is the last time to sweep the area for valuables. The efficient course of action here, from the beginning, would be to choose left and gather the containers first, then enable access to the Remnant Data Core, backtrack to the middle then go right to grab it, go all the way back to the left to raise the console controlling the shield to the final loot container, go back to the right again, defeat the Destroyer and solve the puzzle, lower the shortcut platforms in favor of access to the final container, use the console to lower the shield around the final container chamber, then deal with the Remnant at the vault center.
Now, the only job remaining should be pushing the button that terraforms Voeld. On doing that, remember what you did on the Eos vault and sprint a lot. If you didn't lower the shortcut platforms, you'll get out of the area faster but at the expense of the Fusion Mod of Resistance awarded upon looting the final container.
In the gravity well room, use the console to shut down the purification process. The mission completes.
Aftermath
When Ryder has exited the vault, SAM remarks that the temperature has increased by 13 degrees since activating the vault.
The hazard zones have become less cold, but it's not enough to remove the destructive effects of those environments on Ryder's Life Support. It is still depleted.
Rewards
Enemies
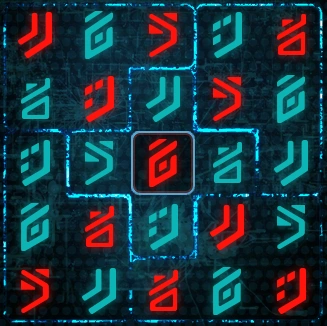
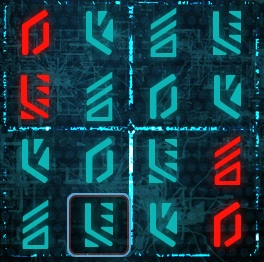
Puzzle Solutions
- Main article: Remnant Decryption Puzzle Guide
 |
 |
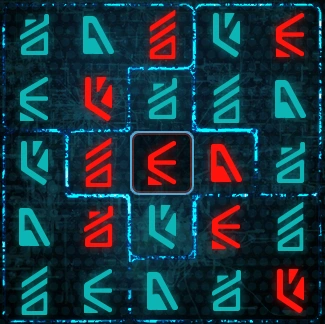 |
| Southwestern Monolith | Northern Monolith | Southeastern Monolith |
 |
||
| Vault Console |
Trivia
- When speaking with the angara, they have no comments on the activation of the vault - not even Moshae Sjefa. The same indifference is noted with the Initiative representatives Foster Addison and Jarun Tann.