The rogue VI must be stopped, but first the lockdown must be overridden from Prometheus and Vulcan Stations.
Acquisition[]
The assignment is acquired after clearing out Hermes Station. Dr. Gavin Archer explains the situation with Cerberus' research outposts on Aite, and directs Shepard to locate the three other stations to contain the rogue VI.
Preparation[]
You again have the opportunity to change your squad at this point, but it won't make a huge difference because Shepard will have to solo most of the combat sections. If you have Disruptor Ammo then equip it, or failing that Armor-Piercing Ammo, Incendiary Ammo, or Warp Ammo will help. Otherwise, choose squadmates who have any of those powers available for squad use and deploy them on your preferred weapons before getting separated. Finally, if there is still a spot left in the squad after ammo powers are covered, taking Miranda with points in Cerberus Officer will apply her squad health bonus to Shepard throughout the mission.
Consider equipping Shepard with one of the faster-firing weapons in the Assault Rifle or Submachine Gun slot in preparation for a major time-critical battle ahead.
For heavy weapons, you might consider the Arc Projector to deal with rooms of geth, or the M-622 Avalanche to nail tightly packed geth arriving on various elevators. Or, if your weaponry isn't particularly up to tearing through a bossload of armor in the final encounter then take a heavy weapon that is.
Walkthrough[]
Override Atlas Lockdown[]
If you have not already done so, travel to Vulcan Station and Prometheus Station and issue the final two lockdown override commands. These, combined with Dr. Archer's override command at Hermes Station, allow you to gain entrance to Atlas Station.
Atlas Station Entrance[]
Once you have unlocked the station, head there, near one of the data packets, under the waterfall, and “end this nightmare.”
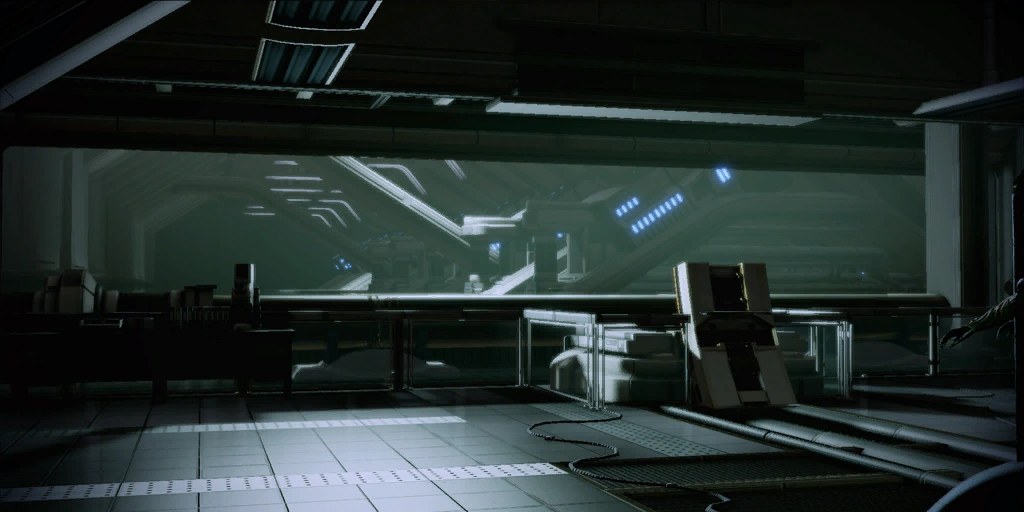
The Hammerhead descends into the station to a landing pad, and the squad exits. Archer comes over the comm and says that the VI is trying to upload itself directly from your location! Get to the server room and stop that. Archer is again cut off in midsentence before he can finish. Head through the door and investigate the damaged equipment to get access to the facility.
Head to the door, it will open and proceed down the hallway. Keep following the hall until you reach a door on your left at the bottom of the ramps. Head inside and you will hear another log by Archer. Grab the Computer Hardware salvage (+1500 credits) and the med-kit before heading down the ramp. Head across and call the elevator. Because the elevator has been damaged, it can only move so many floors at a time. In this case two. To get the elevator to your level, seven, call the elevator to level four. Walk back up the stairs and use the Secure Computer there. It will move the elevator three more levels up to level seven. An alternate method is to call the elevator to an odd level (i.e. 1, 3, or 5) and then keep pressing the elevator summon button, after level 5 the elevator will reach level 7 without a malfunction.
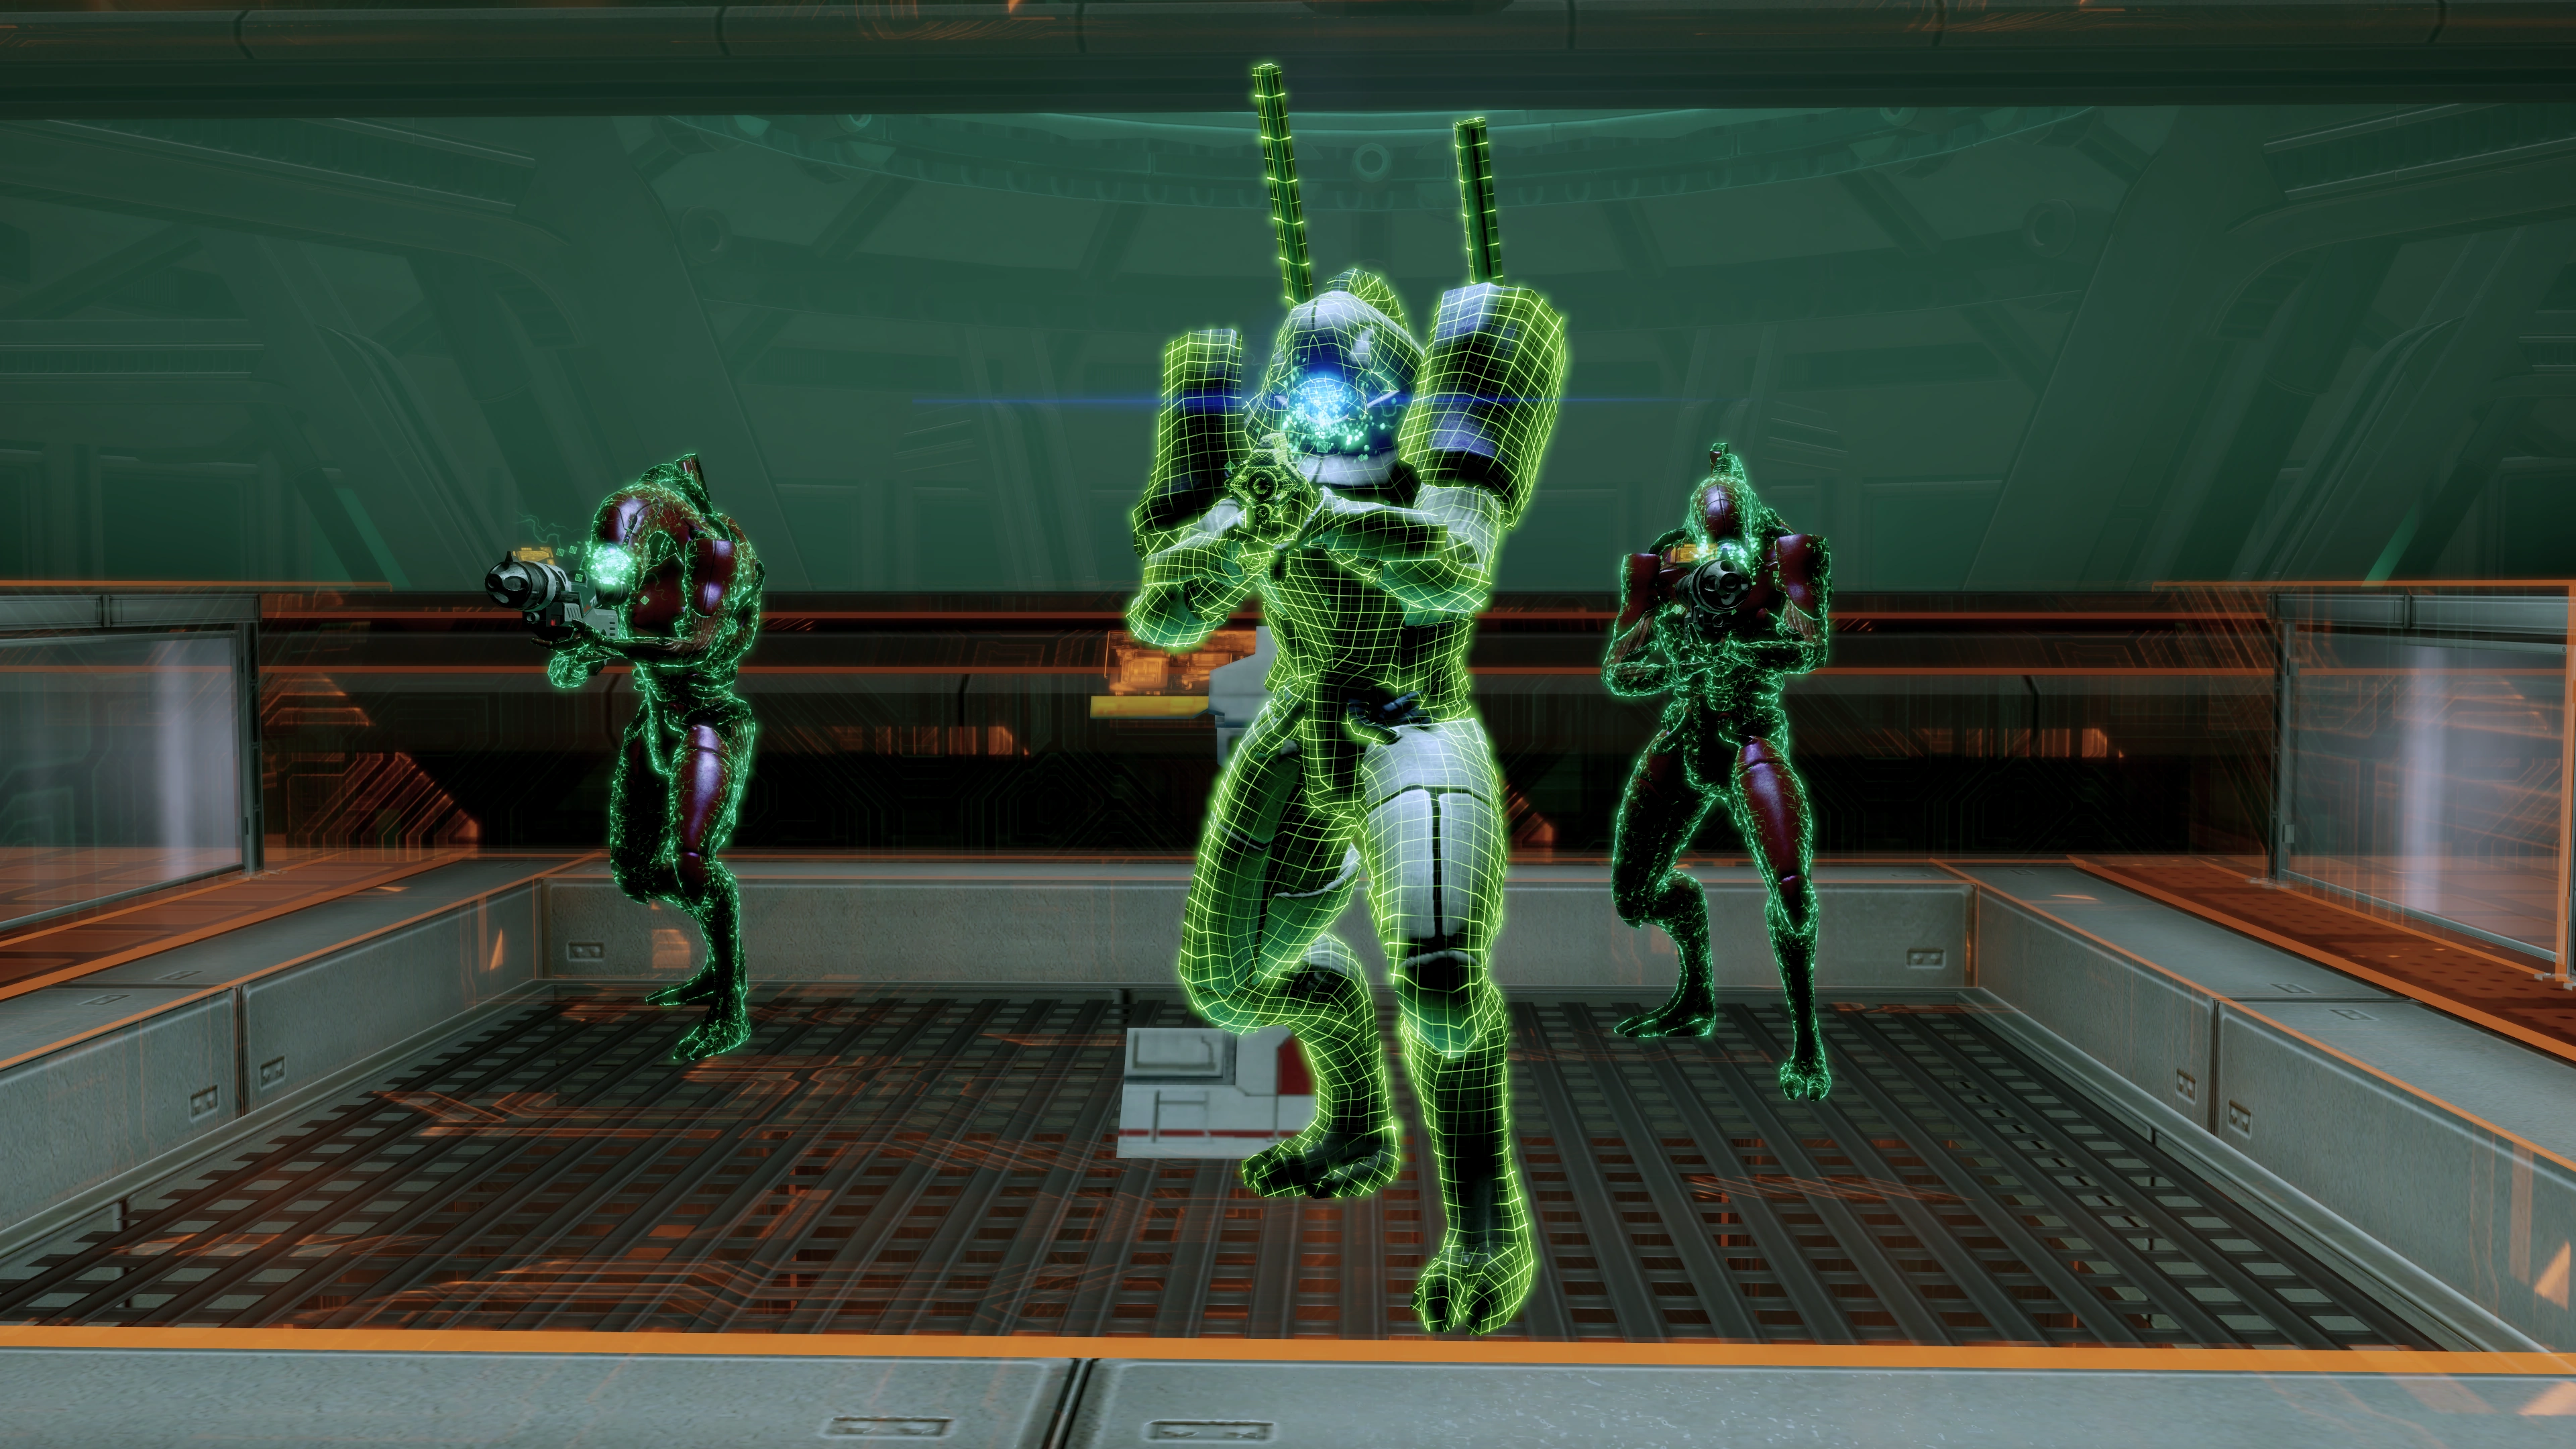
Get into cover because if you expected that elevator to come up empty, then you are sorely mistaken. It arrives with a Geth Prime and two Geth Troopers. Take the Troopers out as quickly as possible before the Prime gets too close, then head into the elevator. One useful tactic here is knocking the shield off one of the smaller geth and then applying AI Hacking -- this will tend to distract the Prime and can then be repeated with the other geth. Alternately the Arc Projector or Grenade Launcher applied right when the elevator opens will wreak havoc.
Combat Strategy: If you brought the M-622 Avalanche or the Arc Projector then the moment after you call the elevator is an excellent time to ready it in preparation for pumping off several shots as soon as the doors open, which will vastly simplify the coming battle. If you find that taking cover with your squad on the upper level still lets the Geth Prime get dangerously close, then this battle can be easily completed by setting your squadmates into cover down out in the hallway away from the doorway before the elevator room. Once Shepard has called the elevator to the 7th floor, shoot or use powers to get the attention of the geth (if the Geth Prime and Troopers haven't noticed Shepard yet). Run Shepard back to the hallway where your squadmates are located. The geth will follow after Shepard but won't enter the hallway. Shepard then can peek around the open doorway and chip away at the enemies with weapons, powers, and squadmate powers. At any time, Shepard can walk down the hallway to recharge shields and the geth won't follow. Once the Geth Prime goes down, finish the remaining Troopers.
After some ups and downs, the elevator crashes into the bottom of the shaft Tower of Terror style. Head out and you hear another of Archer’s logs. In the room is some refined palladium (+1000 palladium), a hackable computer (+2250 credits), and a damaged geth that can be scanned for a Heavy Skin Weave upgrade. Once you have everything, head down the hallway and after attempting to access the door at the end, the open door shifts to the center door. Inside is the panel to cut all access to the outside world, so access it.
Note: It is recommended you save BEFORE accessing the panel.
Blended Realities[]
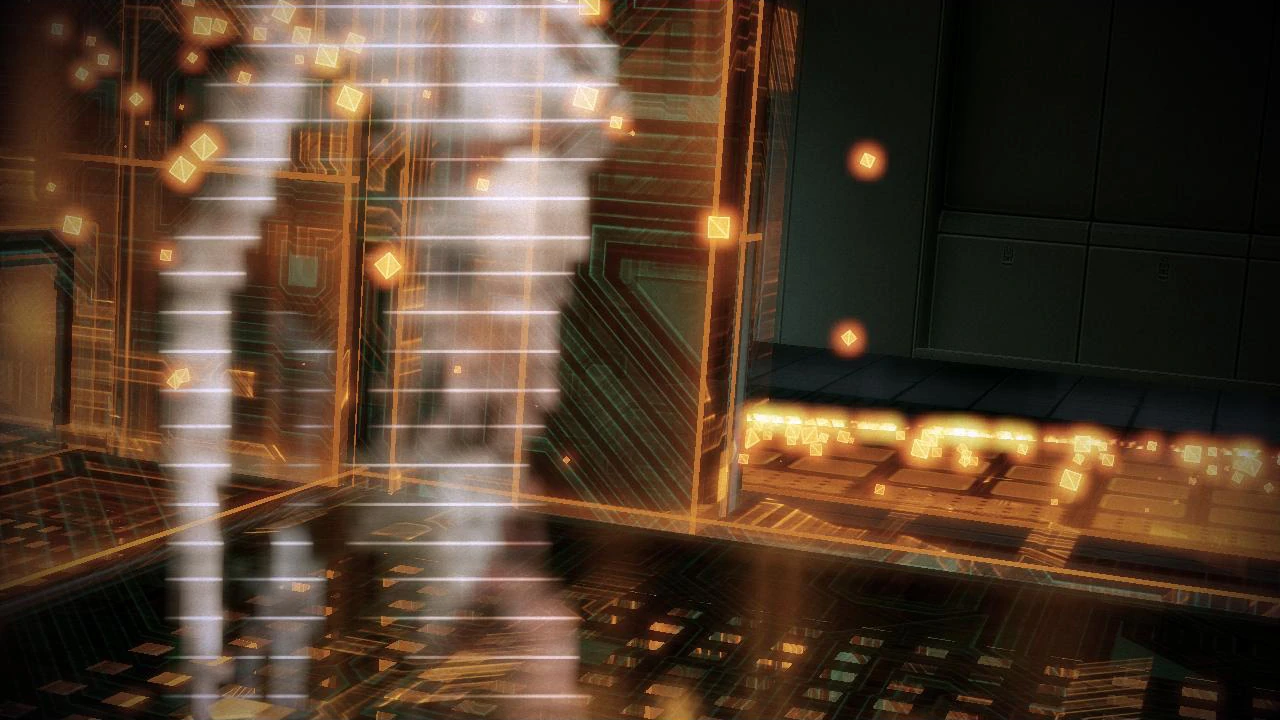
Shepard accesses the panel, but something goes wrong. The virus does something to Shepard’s Omni-tool and cybernetic implants. Shepard’s vision starts to fill up with computer like visions, and Shepard walks out of the room in a daze, then falls to the floor. After getting back up however, the door closes behind Shepard, trapping your squadmates in the room.
Welcome to augmented reality. You are still in the real world, with digital vision layered on top, so you can now understand David. Because you are alone, be sure to look around corners, conserve your ammo, and stay in cover to avoid being killed.
Move down the hallway and take cover at the corner, more geth are around there, so take them out before they do Shepard any damage. Combat Strategy:The geth troopers will get close to Shepard in the main hallway but as long as you stay around the corner in the starting corridor and pop out to shoot and use powers on the geth, who will move to cover and not charge Shepard. Take your time and the geth will fall soon.
Once the troopers are down, move to the end of the hallway and to the door on the right. In the room you see what happened once David was plugged in and how the first time he communicated with the geth went. Once the green reality goes and the orange returns, look around the room for power cells and some refined palladium (+500 palladium). There are two more databases in the main room, accessing one shows Archer and David conversing before David was hooked up. The second shows a scene where David is first interacting with the geth. Note: You aren't required to interact with the other databases in the room - you can skip directly to killing the geth in the next room as soon as you can see them, but unless you're playing Legendary Edition you'll need to jump the wall to join them before the last geth is killed, otherwise the green will return and you'll have to activate a database and fight more geth.
Once you are ready, shoot out the geth hub with three attached Geth Troopers in the next room. When they are eliminated you can jump over the wall and grab the med-kit and the wall safe (+2250 credits). Head out into the corridor and stick to one side, preferably the one with cover. At the end of the hallway is a VI control node, shoot it or melee it, it will start moving, follow it and keep hitting it until it blows up. Note: You can also use powers like Incinerate to damage the control node if you want to. Continue to the end of the hallway.
In the room at the end of the hallway is a computer that allows elevator access. However like the other one, this one comes up full too. A Geth Hunter and two Geth Rocket Troopers come up, so get into cover before they do.
Combat Strategy: Don't just stand there at the elevator controls waiting for the geth to arrive, as that position is easily compromised. Instead use the time to run for better cover, the best of which is probably in the hallway you came in from: you can either use the door frame if you like to fight from cover, or go further down the hallway to avoid the Geth Hunter's shotgun while staying mobile. In either case the geth won't leave the room, so take them down by whatever method works best. Take care to note where the Geth Rocket Troopers are in the room as they can shoot rockets into the hallway at Shepard but they probably won't leave the room. The Rocket Troopers tend to stay in cover popping up to shoot rockets that can easily be dodged from the hallway. Return fire with weapons and powers and the two Rocket Troopers will fall quickly. Any time you get hit by a rocket, you can just move down the hallway and recharge your shields before continuing the fight.
When everything is down, search the room for power cells, salvageable Hardware (+1500 credits), and some refined palladium (+500 palladium). It is highly recommended to save before accessing the elevator. Collect everything you need and then access the elevator to continue.
David[]
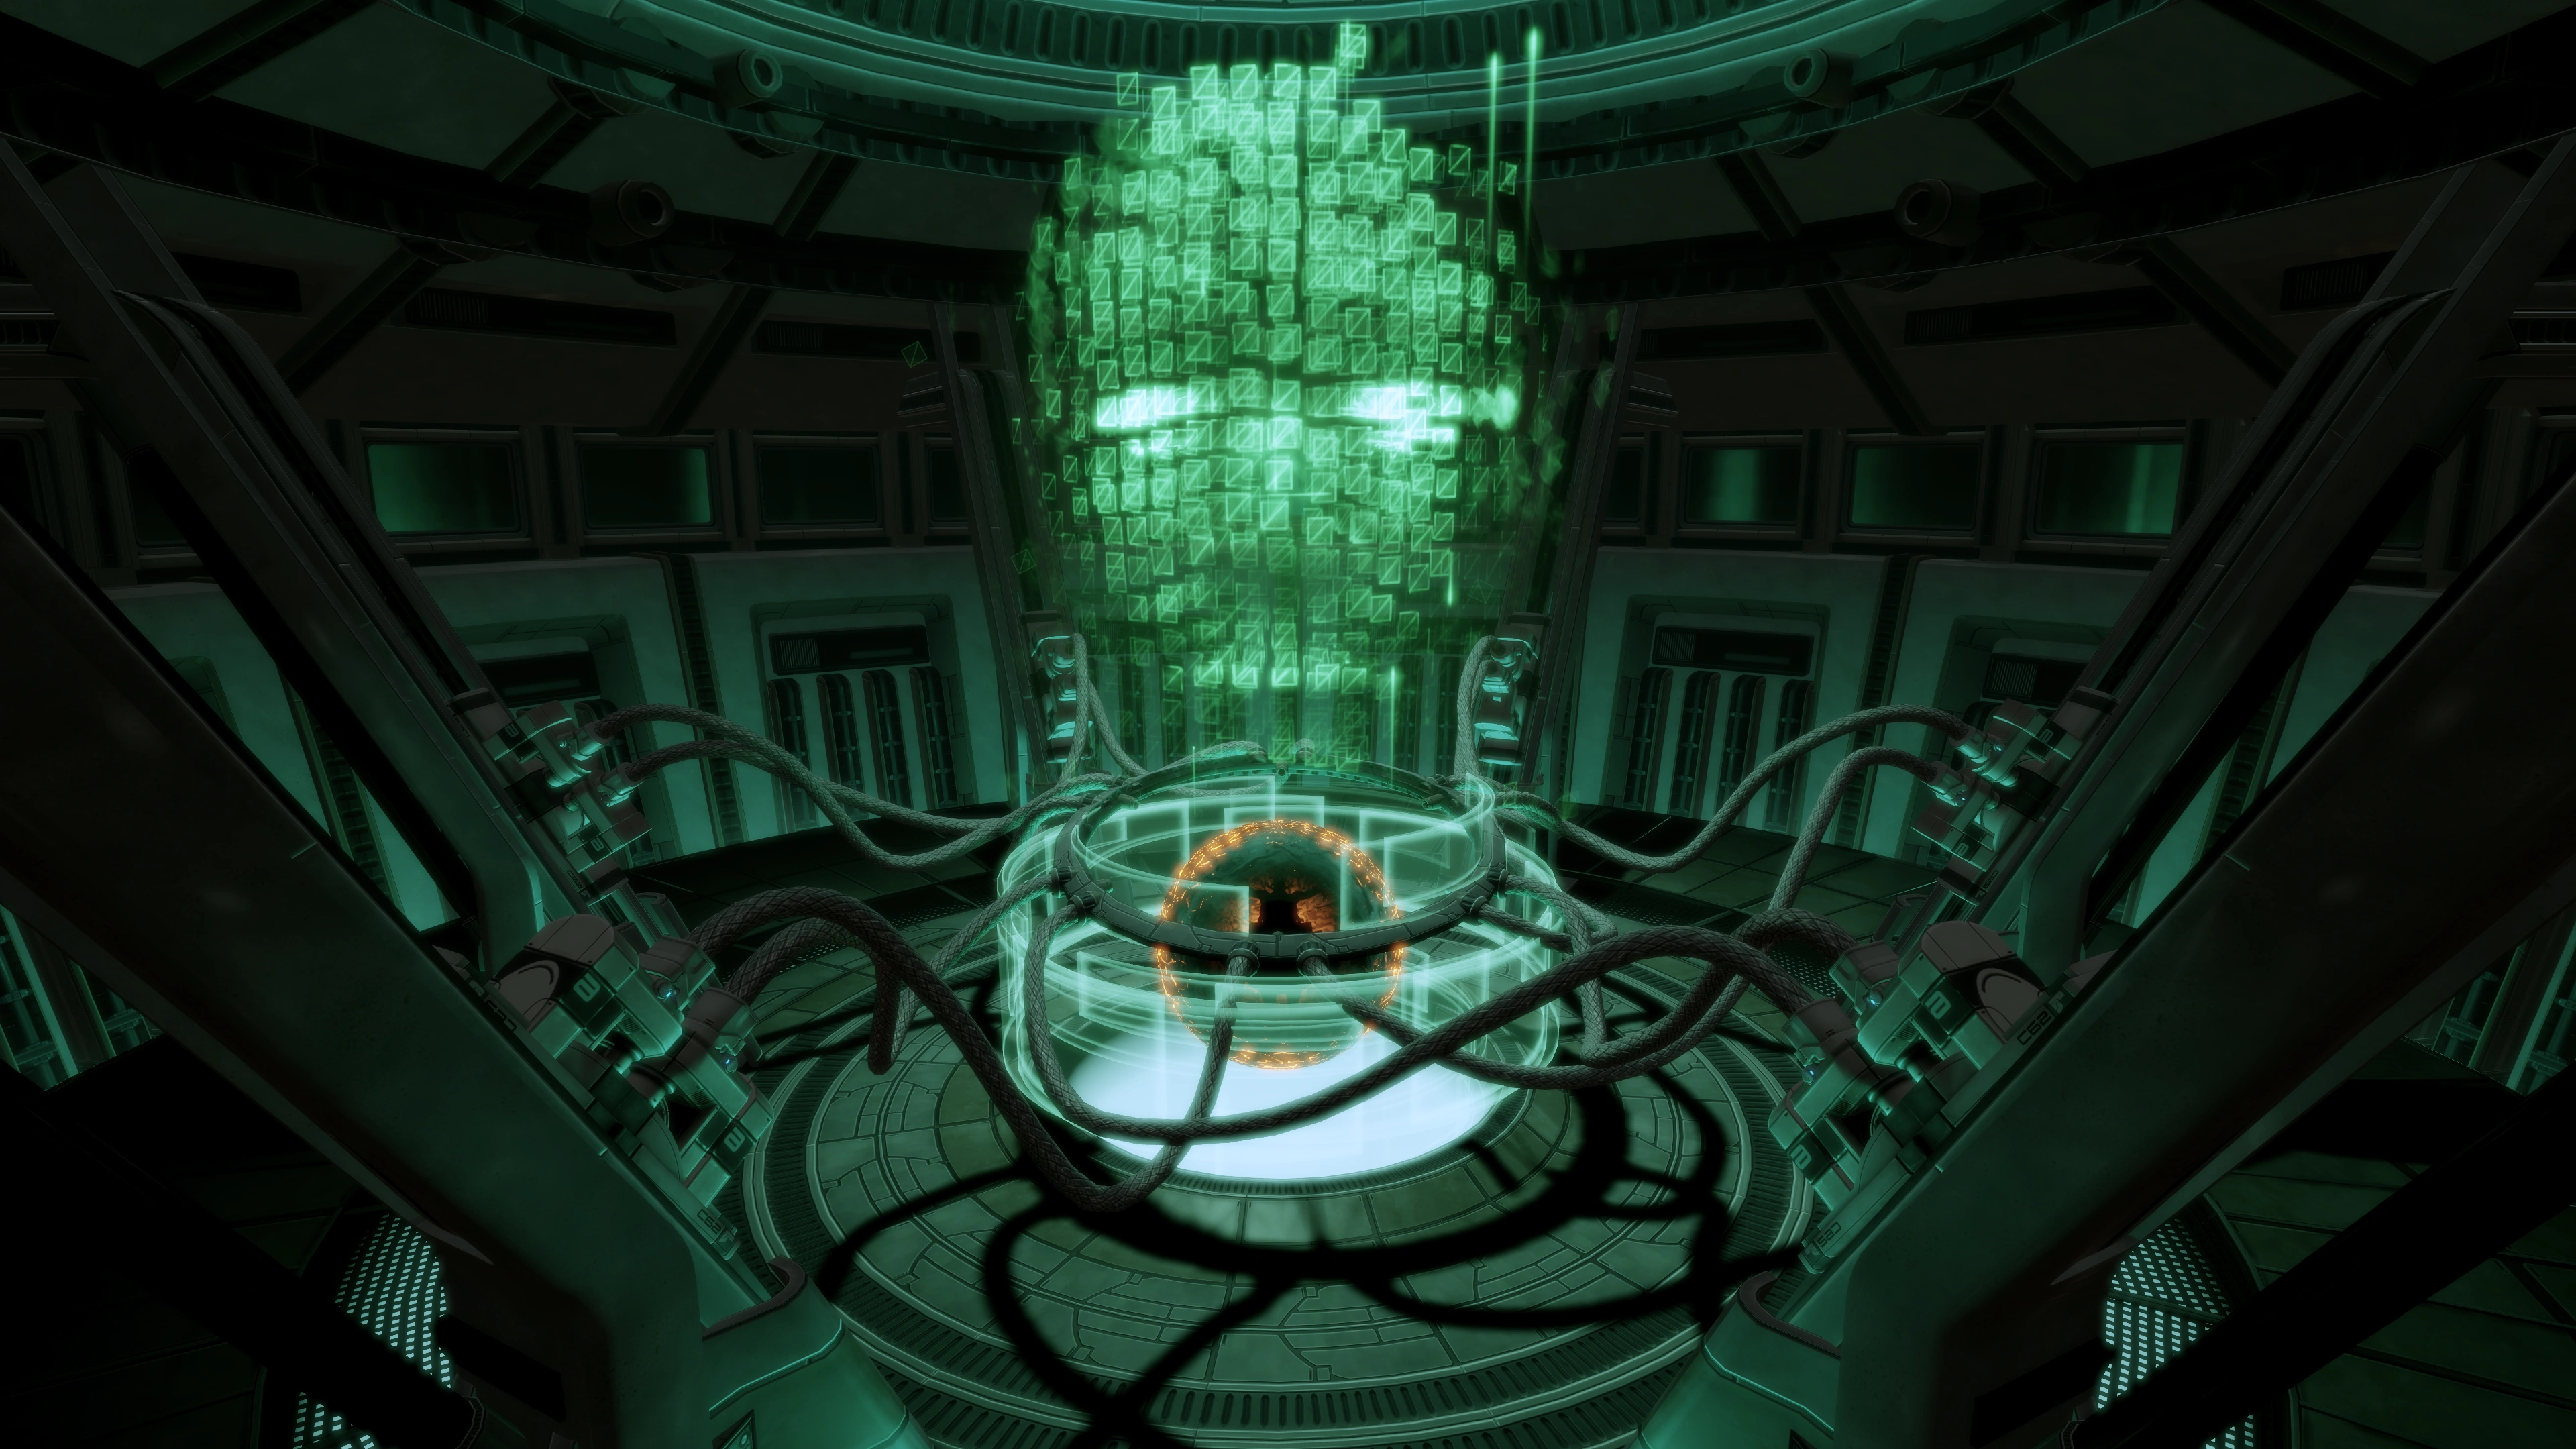
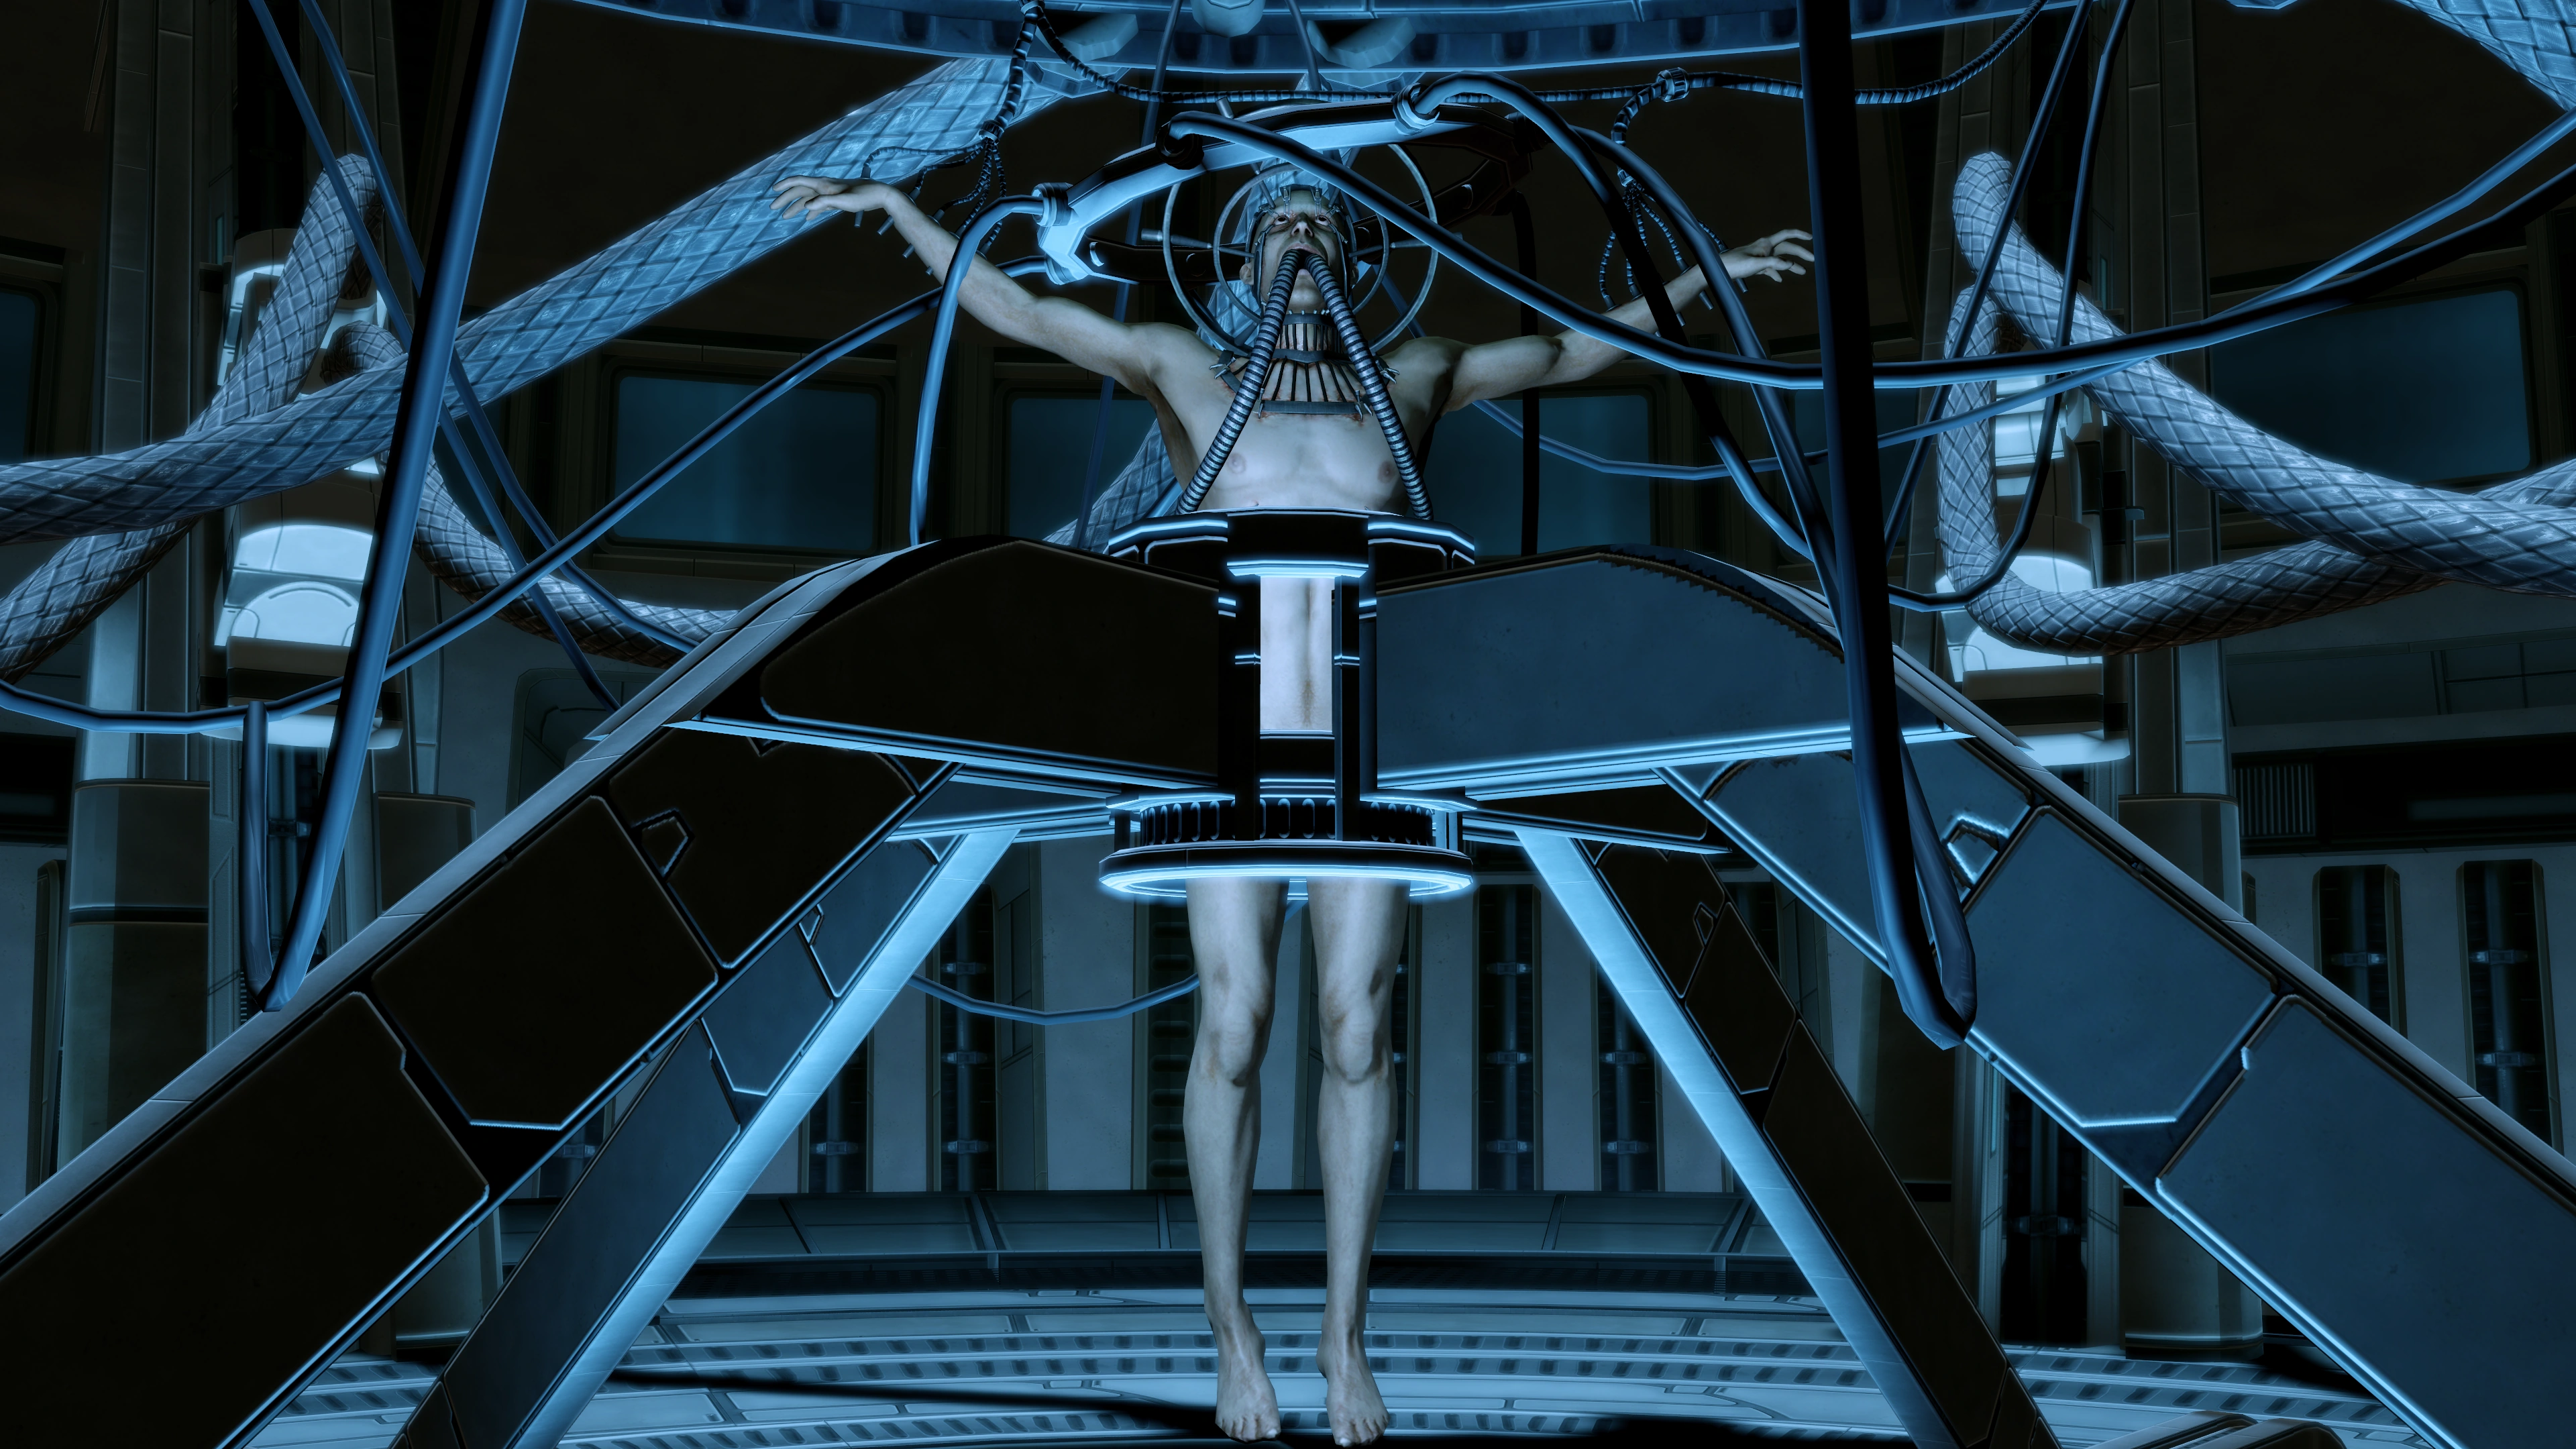
When you reach the bottom, you see the scene where David is first hooked up. However, David has now detected the Normandy SR-2 in orbit, and attempts to upload himself to your ship. STOP HIM!
This battle proceeds in two alternating phases:
First, one or more VI control nodes appear and attempt to climb the cables. There will be one VI control node the first time, two the second, and three after that. You must shoot them to prevent them from reaching the ends of the cables and advancing the upload progress. Even driving them back from the ends without destroying them helps, since only when they reach the end do they advance the upload progress. Keep an eye on the upload progress bar in the lower right hand, if it gets to 100%, then it's critical mission failure. Also, during the second and subsequent repetitions of this phase, David will also call in geth to support him, emerging from green digital portals, so keep in cover and move when necessary. Above all do not let that bar get to 100%. Tip: A fast-firing weapon like an assault rifle or submachine gun is useful for these sections, as their fire rates will help you to "track" the VI's as they jink around. Overload also does a great job if you happen to play one of the classes that has it.
Second, whenever all the VI control nodes are down, any geth are automatically destroyed and David's shield temporarily collapses. Now you have a brief geth-free window to deal as much damage to the armor of the central control node, so equip your most powerful blasting weapon and start shooting. When the shield returns, you will have a few moments in which you can safely gather ammo (there are two respawning ammo nodes around the room) and get to cover before more VI control nodes (and geth) reappear.

Combat Tip: An excellent way to get through this section is as follows: during the long initial audio section, move around the outside of the room until you find a pillar with an ammo cartridge on the side (not the outside): from the place you start at it's the second pillar to your left. Take cover behind this pillar. During each VI Control Node phase, you will have line-of-sight from here to all of the VI control nodes, as long as you switch between peeking out from the left and right sides of your pillar as necessary. Also while you are here the geth will tend not to approach and flank you as long as you are destroying VI control nodes quickly enough, so this is a very safe spot. Whenever David's shield collapses take as many shots as you can, then pick up the respawning ammo and return to your same cover location. Tip: There is enough time to charge and fire the M-920 Cain and finish off the VI after the first phase, just be sure to put enough distance between you and the target so the blast doesn't kill you.
When the core is destroyed, the augmented reality goes away. Shepard is treated to a grisly sight as David is shown in the core tied up to tubes in his arms and mouth, begging for help. Archer comes and argues for Shepard to keep the experiment going. Archer states that nobody ever thought that the experiment would get out of control. Over the course of the conversation, Archer seems to come to his senses, but he still insists you leave David with him. David, on the other hand, begs you to "[m]ake it stop". You can either take him with you, or leave David at the station.
Paragon: If you choose to take David to the Jon Grissom Academy, Archer pulls a gun and shoots at Shepard. However the shots are dodged and Shepard puts a gun in Archer’s face. A Paragon interrupt will allow Shepard to pistol whip Archer for his actions, which just goes to show you that even Paragon Shepard gets to live on the wild side every now and then.
Renegade: If you choose to leave David with Dr. Archer, the Commander punches the doctor and tells him the only reason he gets to survive is because his research may prevent war with the geth.
Note: None of the preceding choices, dialogue options, or interrupts award any morality points of any kind. In fact, there are no morality points available in the entirety of the Overlord DLC.
After Shepard resolves the moral dilemma surrounding Project Overlord, the Commander radios Joker for pickup.
Logs[]
“Archer’s Log 135.3: For years my brother has been a handicap. That changed today. His autistic mind is the breakthrough I’ve been looking for - - he can communicate with the geth! Such a tremendous grasp of mathematics. It seems serendipity is alive and well in the 22nd century.”
“Archer Log 157.8: Unless he sees results, the Illusive Man is shutting us down next week. I have no choice. I am going to tap David directly into the geth neural network and see if he can influence them. Danger should be negligible. David might even enjoy it.”
“Archer Log 164.4: I’d be lying if I said that no harm could come to David. His autistic mind is just as alien to me as an actual alien. Anything could happen when we plug him in. But I have to try, don’t I?”
E-Mail[]
Commander Shepard will receive one of two e-mails from the Illusive Man after completing this assignment, depending on the choice made about David Archer's fate:
Paragon: Dr. Archer's Brother
Renegade: Dr. Archer's Brother
Enemies[]
Mass Effect 3 Consequences[]
If David was taken to Grissom Academy, he will appear there, having recovered from what was done to him. Dr. Gavin Archer will appear later during a mission, where he reveals that he left Cerberus because of regret for what he did. He will be relieved to hear that David survived, and will assist in the war effort after the mission is completed. If David wasn't released, Dr. Archer will reveal that he had to mercy-kill David, and left Cerberus because the guilt became too much.
If David was sent to Grissom Academy but the academy wasn't saved, or it was saved but Shepard claims ignorance of David's fate, then Dr. Gavin Archer is implied to kill himself.
Mission Summary[]
Paragon: The rogue VI was successfully shut down, but the test subject was taken to a non-Cerberus facility for care. While this is a considerable setback for Cerberus, Dr. Archer's research will be instrumental in devising a safer approach to controlling the geth.
Renegade: The rogue VI was successfully shut down, and the test subject was left in Dr. Archer's care. After a suitable period of safety evaluation, Project Overlord will soon be up and running again.
- Experience: 250 (312)
- Upgrades
- Credits: 15000
- Cerberus Funding: 7500
- Credits Found: 7500
- Resources
- Palladium: 2000
| ← Previous Assignment | Assignment Index | |
|---|---|---|
| Overlord: Prometheus Station | Assignments |